[Rails 6 Series] Setting up AWS resources
Posts in Series
- Rails 6 Series - Starting Rails 6 with Vue on AWS
- Rails 6 Series - Setting up AWS resources
- Rails 6 Series - Deploying to AWS
- Rails 6 Series - Configuring Vue and Webpack
Overview
To begin hosting our application in AWS we will first go into the Console and set up our environment configuration on AWS Elastic Beanstalk manually. Beanstalk can create your RDS instance as well however we will be creating our separately. This is because resetting or tearing down your beanstalk stack also deletes the RDS instance which may not always be desired. This post will go through the Console but everything can be done via the CLI as well. Since this is a one time setup, I have opted to just use the Console directly.
Let’s go into the Console and log in. After that select the desired region to use, I will be using us-west-2.
VPC
For our beanstalk application, we will create our own VPC instead of using the default VPC. This is not strictly required but does make things cleaner down the road having the application separated into its own resources. Doing so will not incur any additional cost either!
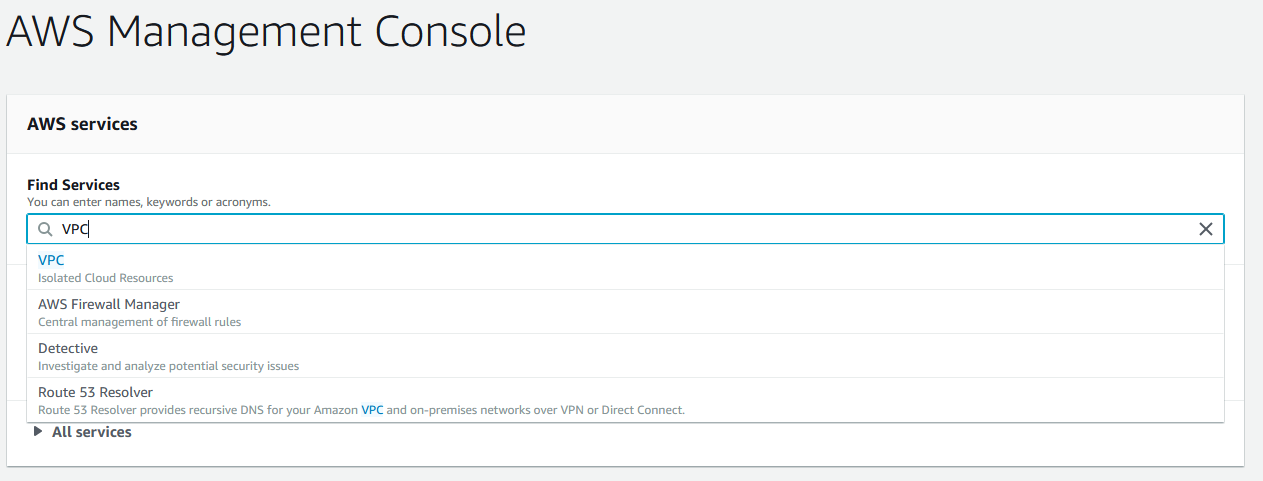
From the main console page, head over to the VPC page.
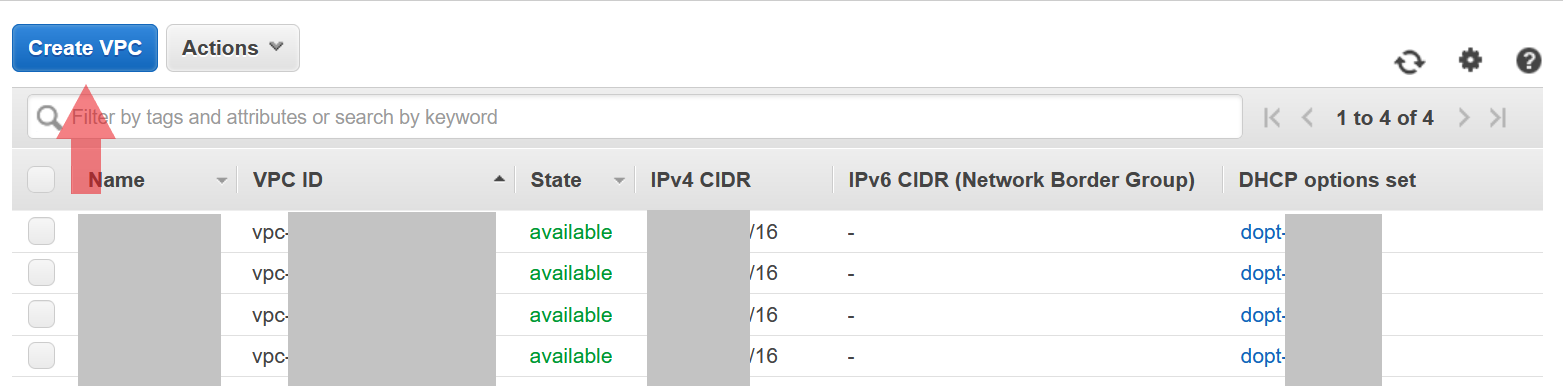
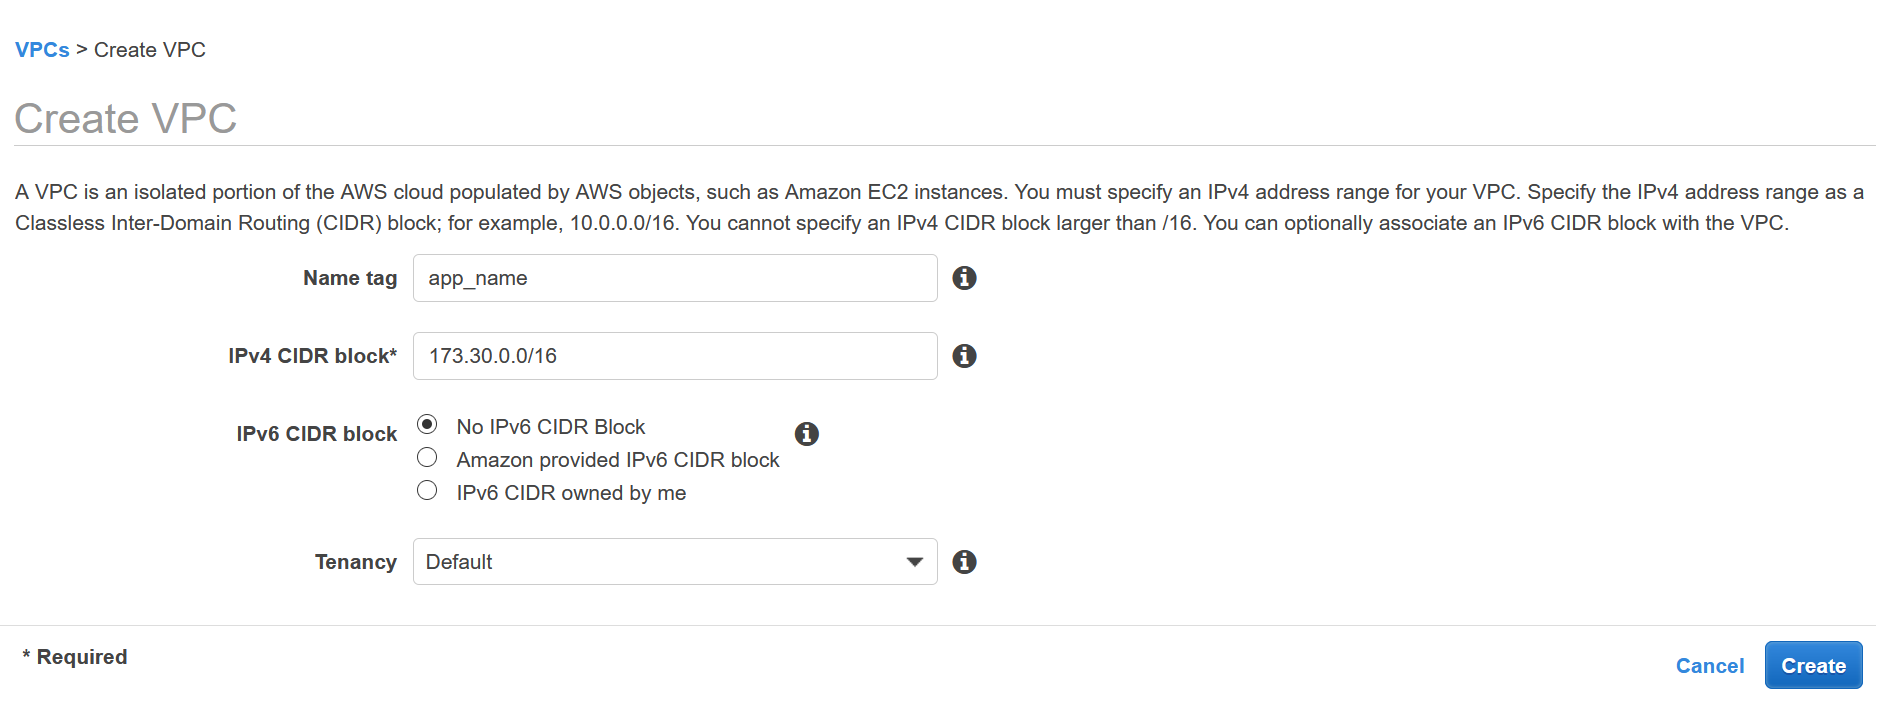
Create a VPC, you can name it whatever you want. I chose my project name for my VPC name. For the CIDR block we do not need to restrict ourselves so we will create a large VPC with a /16 block.
If you feel that is excessive feel free to reduce it to /18 or /20. We are also not using Dedicated tenancy so we will stick to Default.
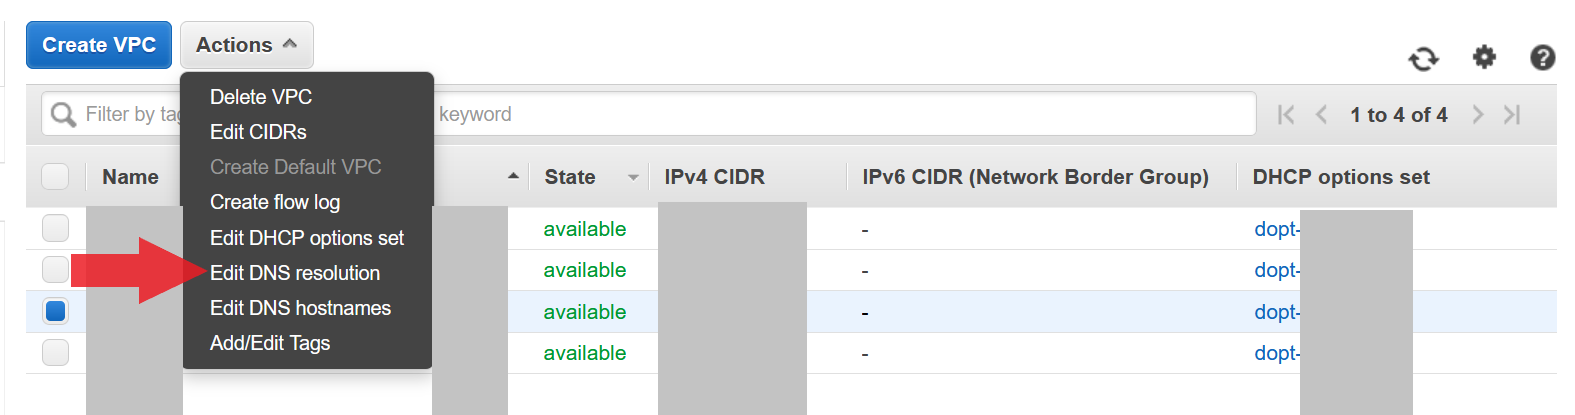
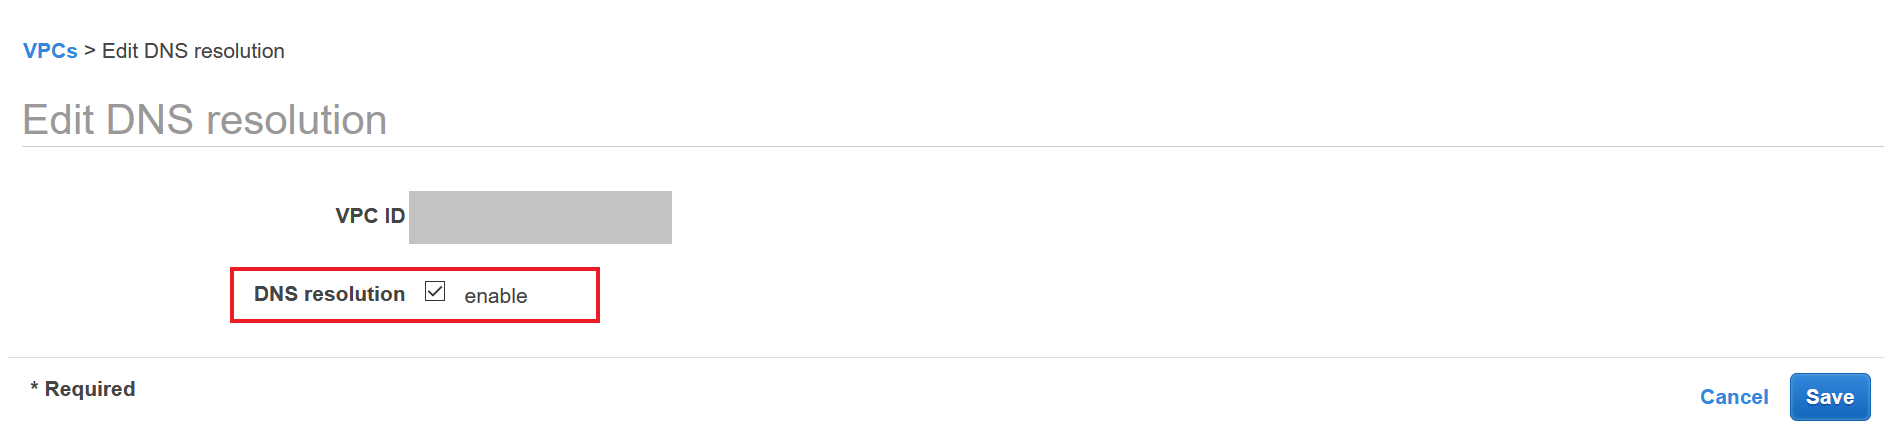
The next thing to ensure is that DNS resolution is enabled within your VPC. If this is not toggled then you will be unable to use an ELB with your EC2 targets. Simply go to Edit DNS resolution and ensure that the DNS resolution checkbox is enabled.
Subnet
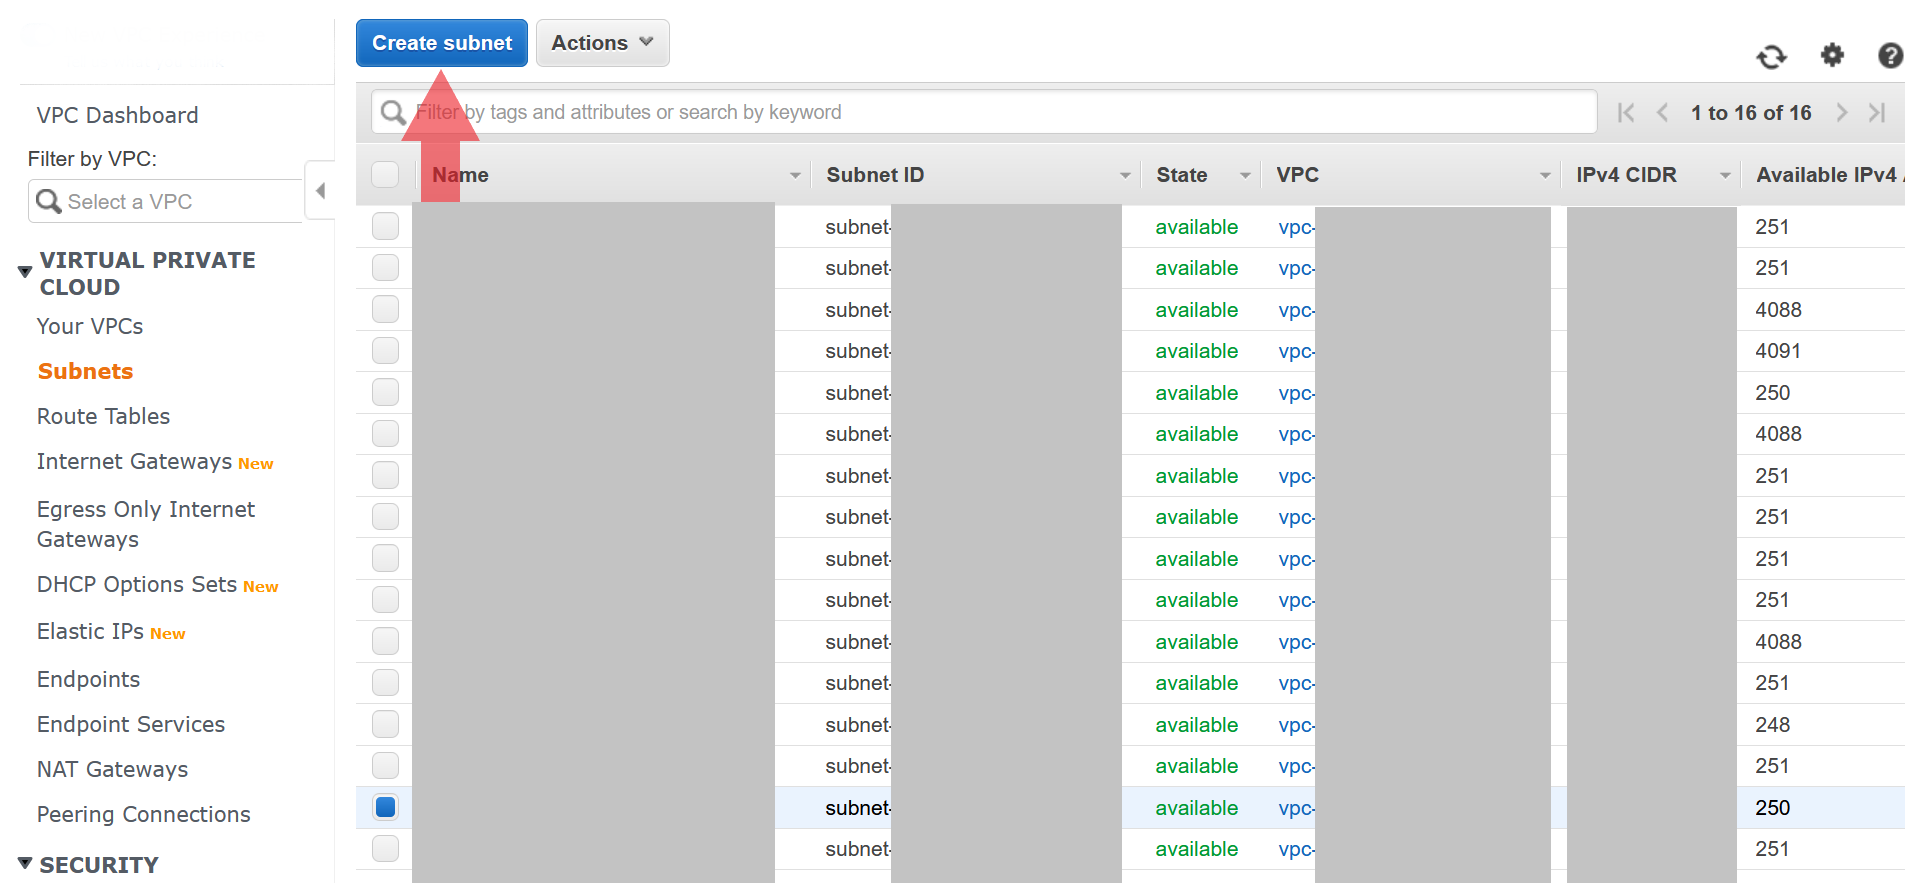
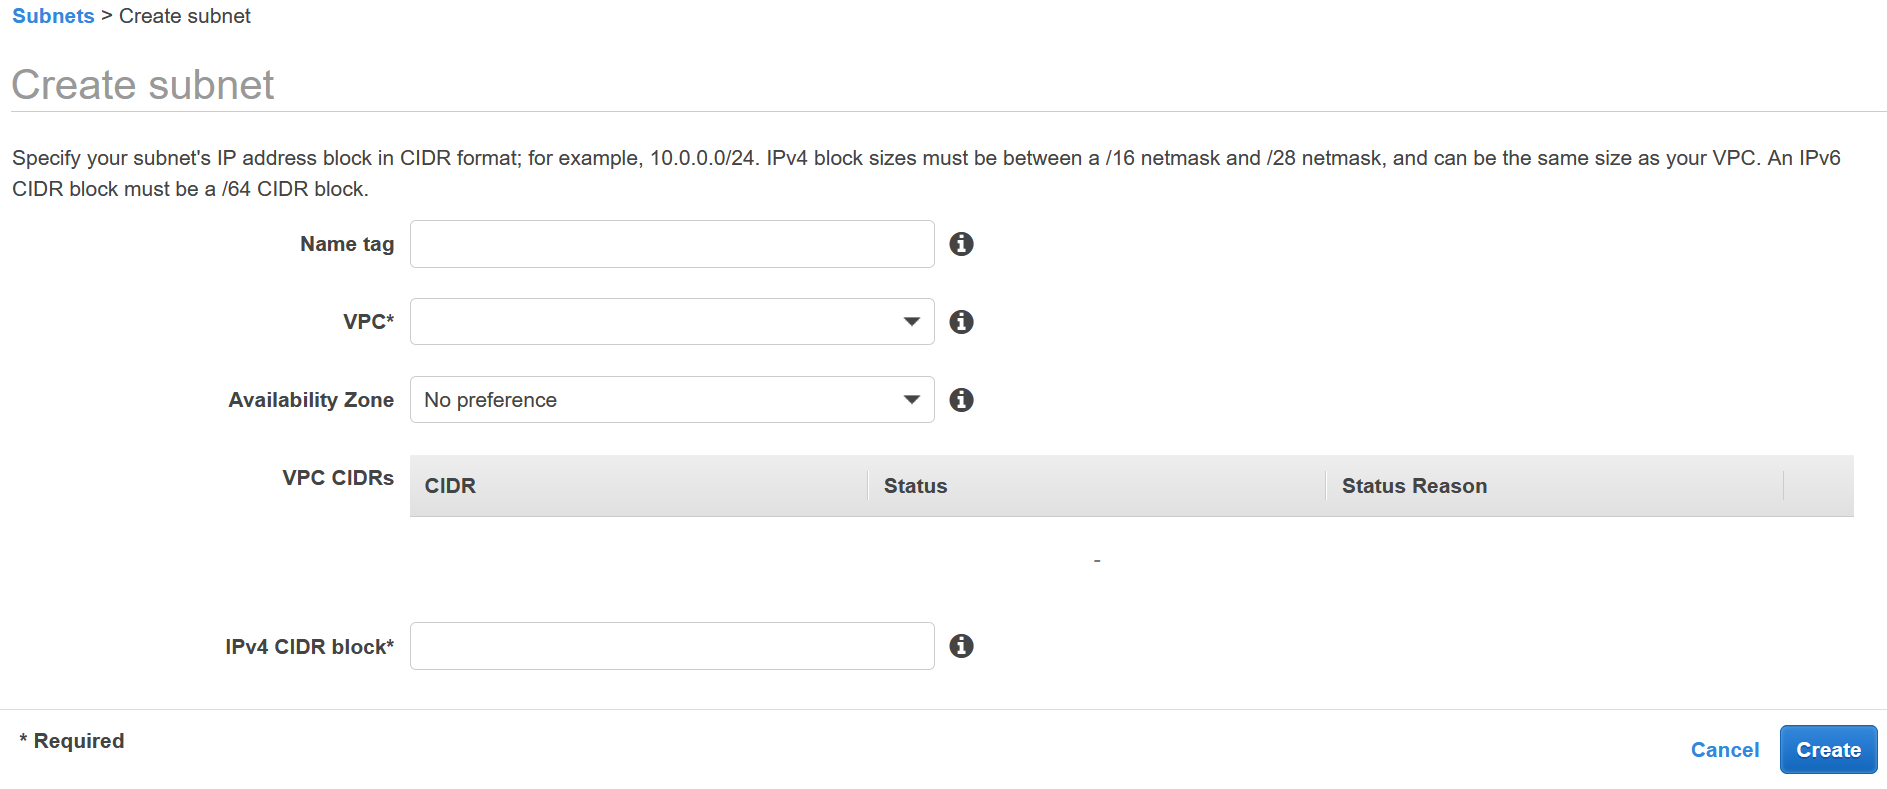
Best practice is to create at least 2 subnets so that you can have hosts in 2 different availability zones. This increases the availability story of your application. Let’s go ahead and create 2 subnet’s in our new VPC (or default VPC if you decided not to create a new VPC). Head over to the VPC overview page and select the Subnets link from the left navbar. Hit the Create Subnet button at the top of the page.
- First select the VPC you want to create the subnet
- Pick an Availability Zone (make sure each subnet has a different one)
- Create your CIDR range so that its a subset of the main VPC. For example use
172.30.1.0/24and172.30.2.0/24.
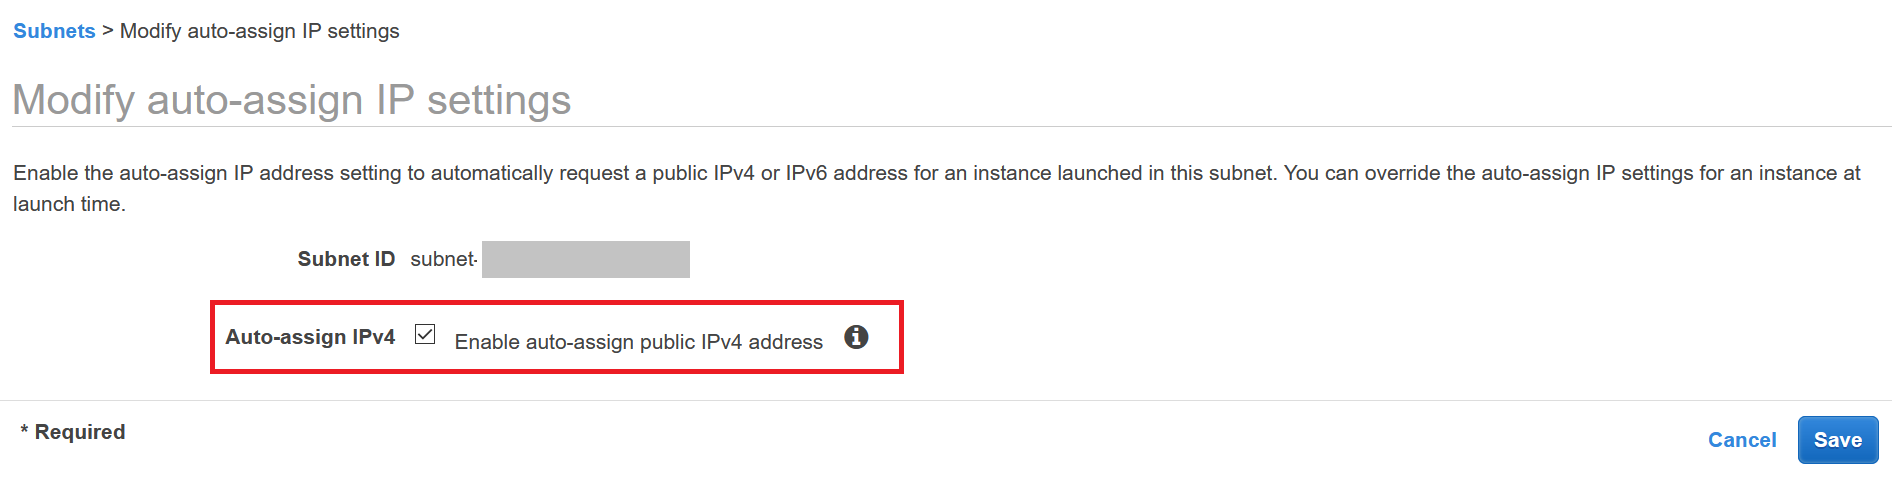
To make life a bit easier let’s make sure to enable public ip’s on our instances. We will be applying a security group so that only the ELB can talk to the instances but this will allow us to expand that later if need be.
- Select each subnet on the Subnets page for our VPC
- Select
Actionsat the top and navigate toModify auto-assign IP settings - Ensure that the checkbox is enabled
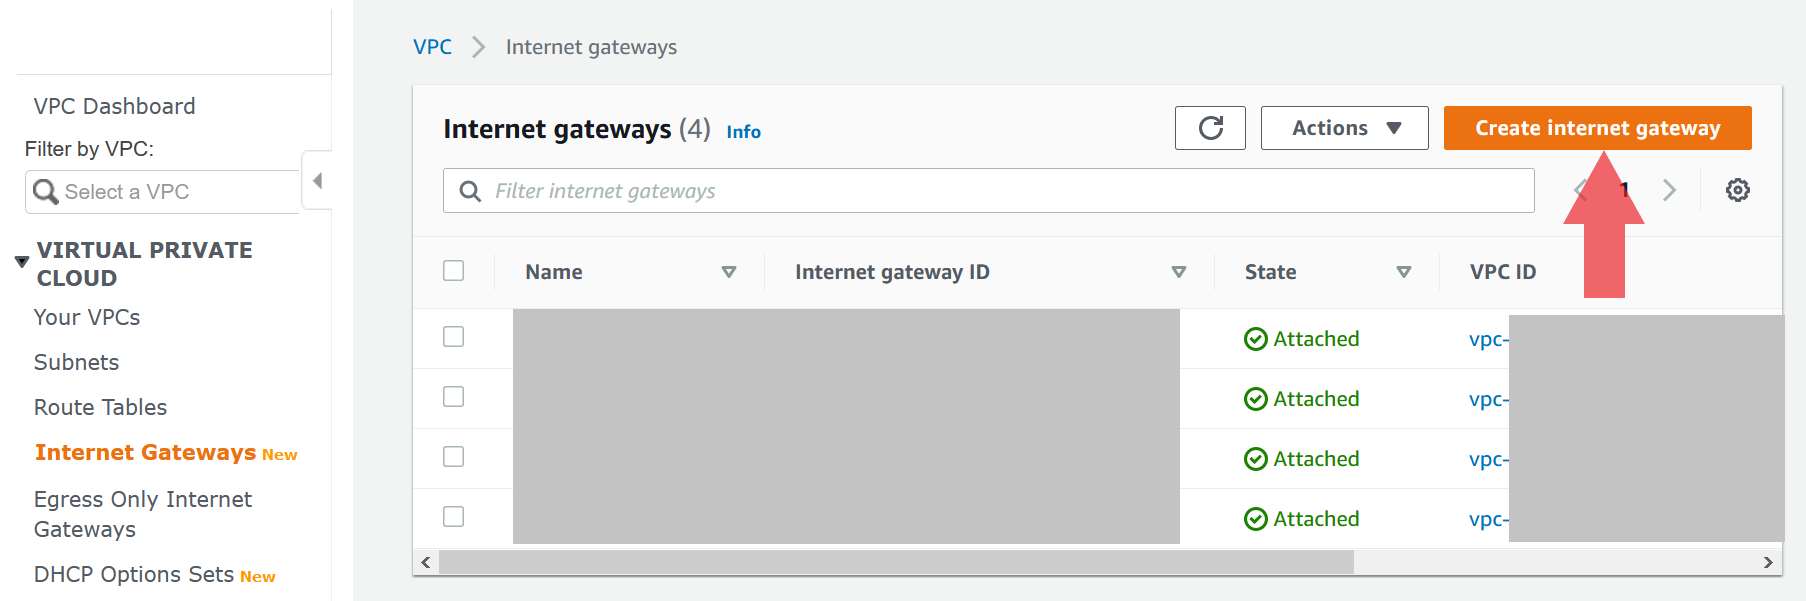
Internet Gateway
In order to route traffic to your ELB and ultimately your application, your VPC must be able to have ingress/egress from the internet. On the same VPC page, select the Internet Gateways link and create a new Internet Gateway.
This will allow us to attach it to the VPC. Once the Internet Gateway is created, from the Actions dropdown attach it to the desired VPC.
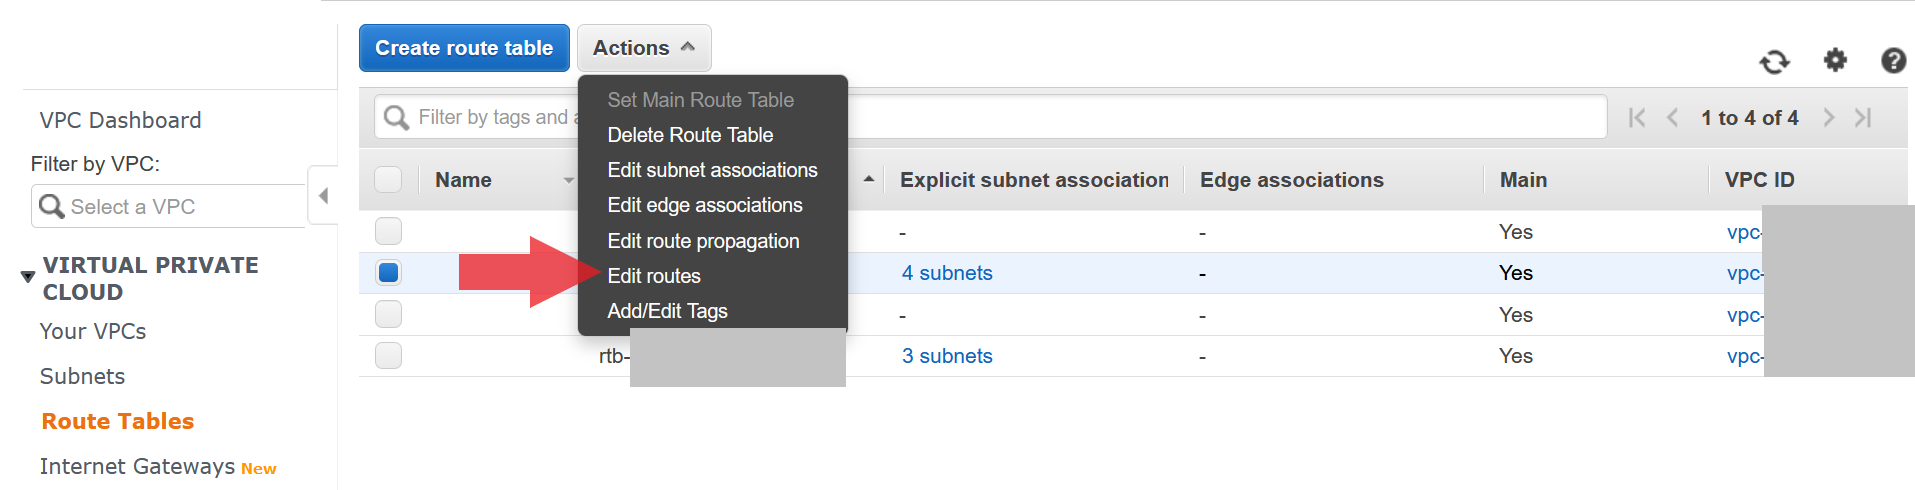
Route Table
The next step is to make sure that your route table can route traffic correctly between resources inside your VPC and from the internet through your internet gateway.
- From the VPC page, select the
Route Tablestab - Select the route table for your VPC
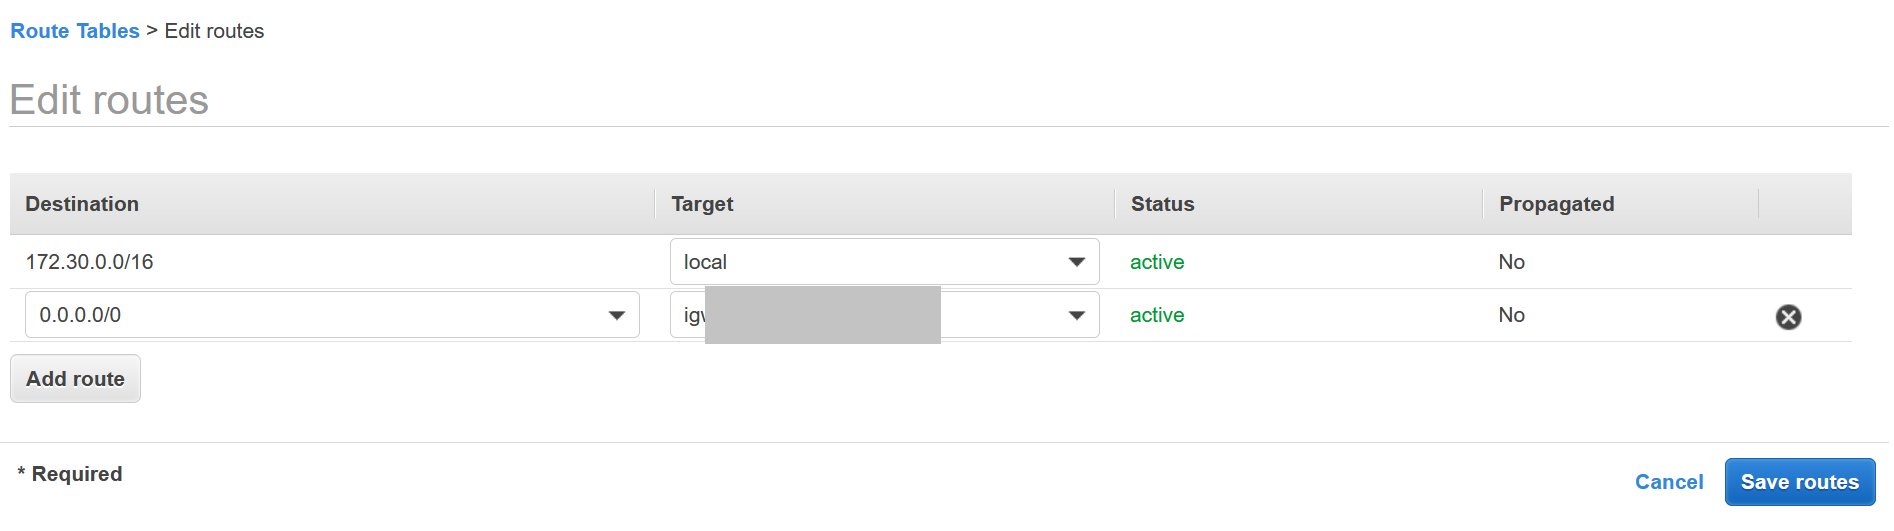
- Under
ActionsselectEdit Routes - In the routes page, make sure you have your VPC ip CIDR map to
localand0.0.0.0/0route to your internet gateway
EC2
We will now setup our EC2 resources which will just consist of a new security group for our application. Go back to the console and head over to the EC2 page.

Security Group
We need 2 security groups for our application. The first one will be for our ELB/targets and the second will be for our RDS instance.
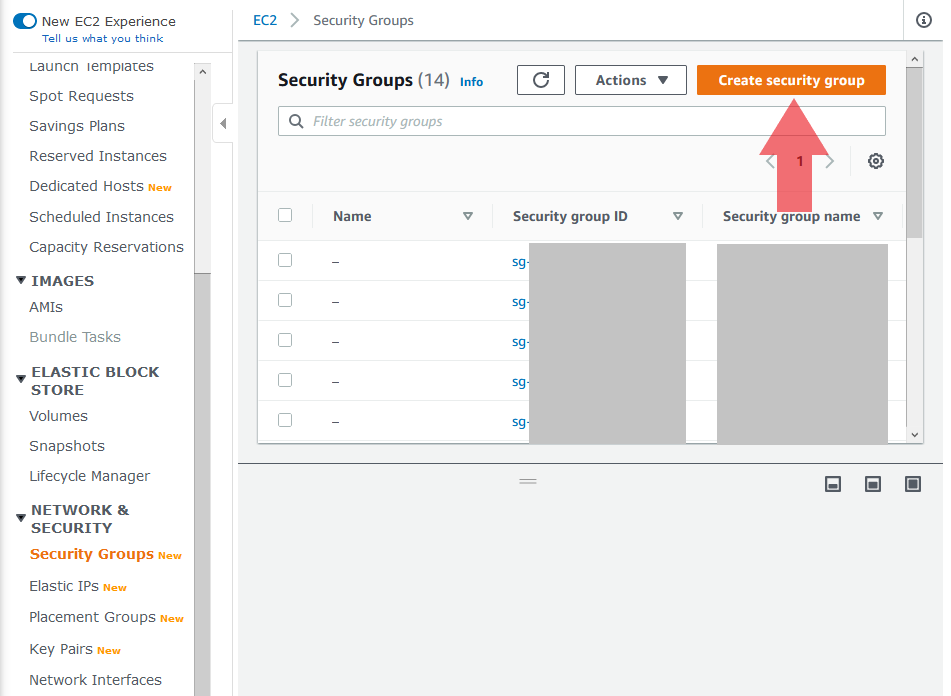
Application Security Group
From the left bar select Security Groups which will be under the Network & Security heading. After that hit the Create security group button.
- You can name the security group anything, I chose
app_name-web - Select your VPC
- Outbound rules can be simple:
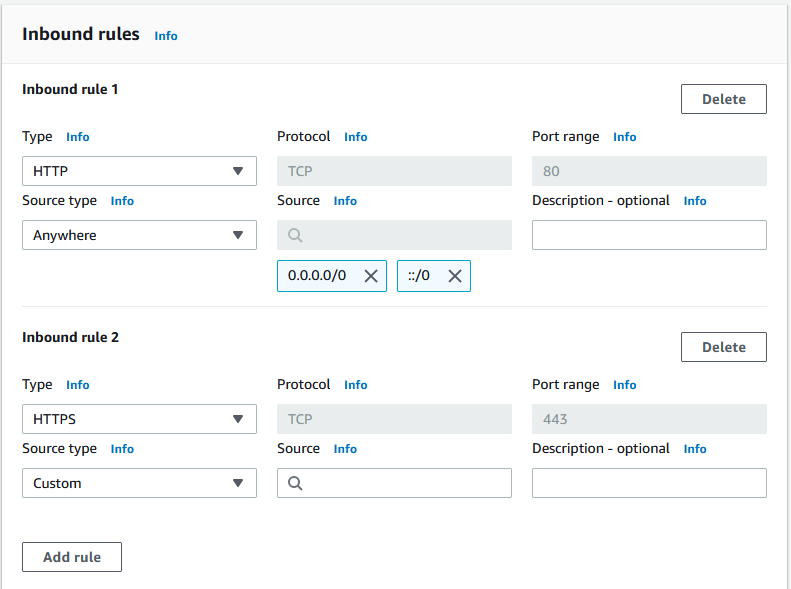
All Traffic:0.0.0.0/0 - Inbound rules
- Make sure to lock it to HTTP and HTTPS traffic only
RDS Security Group
Create another security group following the same steps as above with a few adjustments.
- You can name the security group anything, I chose
app_name-dbto distinguish that this is for RDS - Select your VPC
- Outbound rules can be simple:
All Traffic:0.0.0.0/0 - Inbound rules
- Use Protocol
TCP - Enter the port that you will use for the RDS instance, default Postgres port is
5432 - Source should be the security group id from our application security group,
app_name-web
- Use Protocol
This will lock down the RDS instance to just the instances within our security group for the application.
RDS
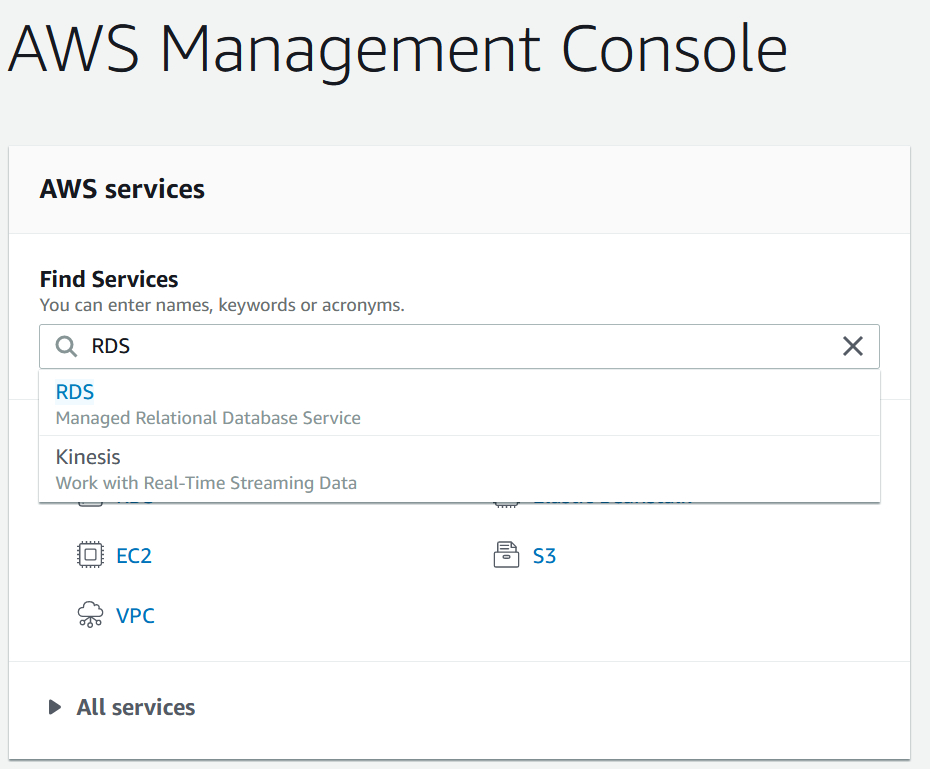
The last thing we need to setup before we create our Elastic Beanstalk environment is the database. RDS provides a free tier for most of the databases offered. From the main console page, go to the RDS page.
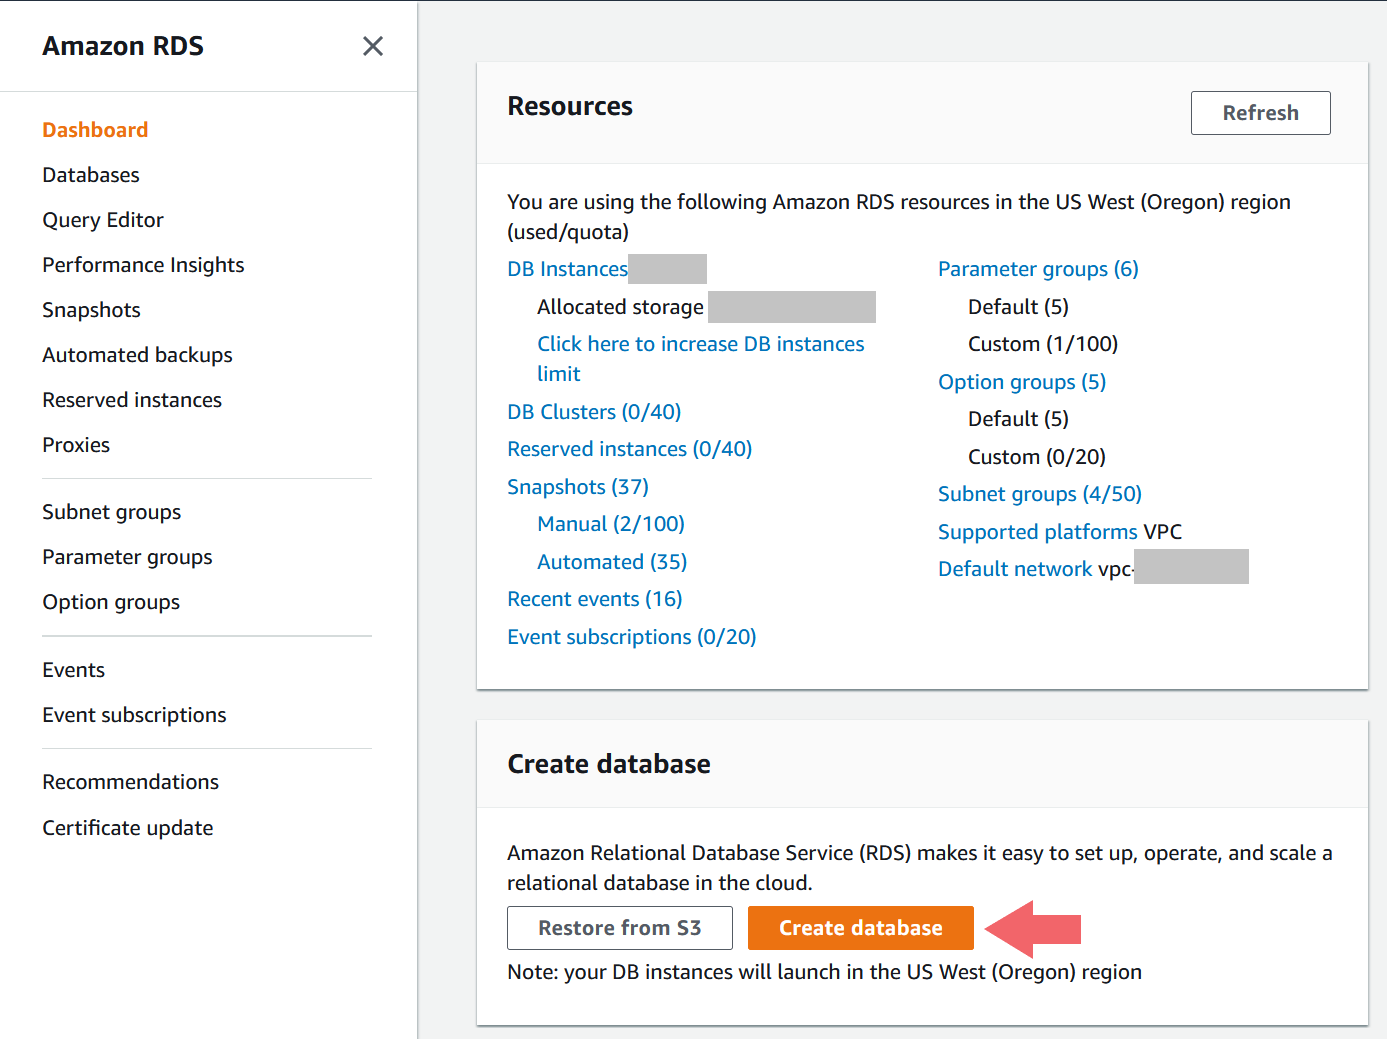
- From the RDS page, hit the
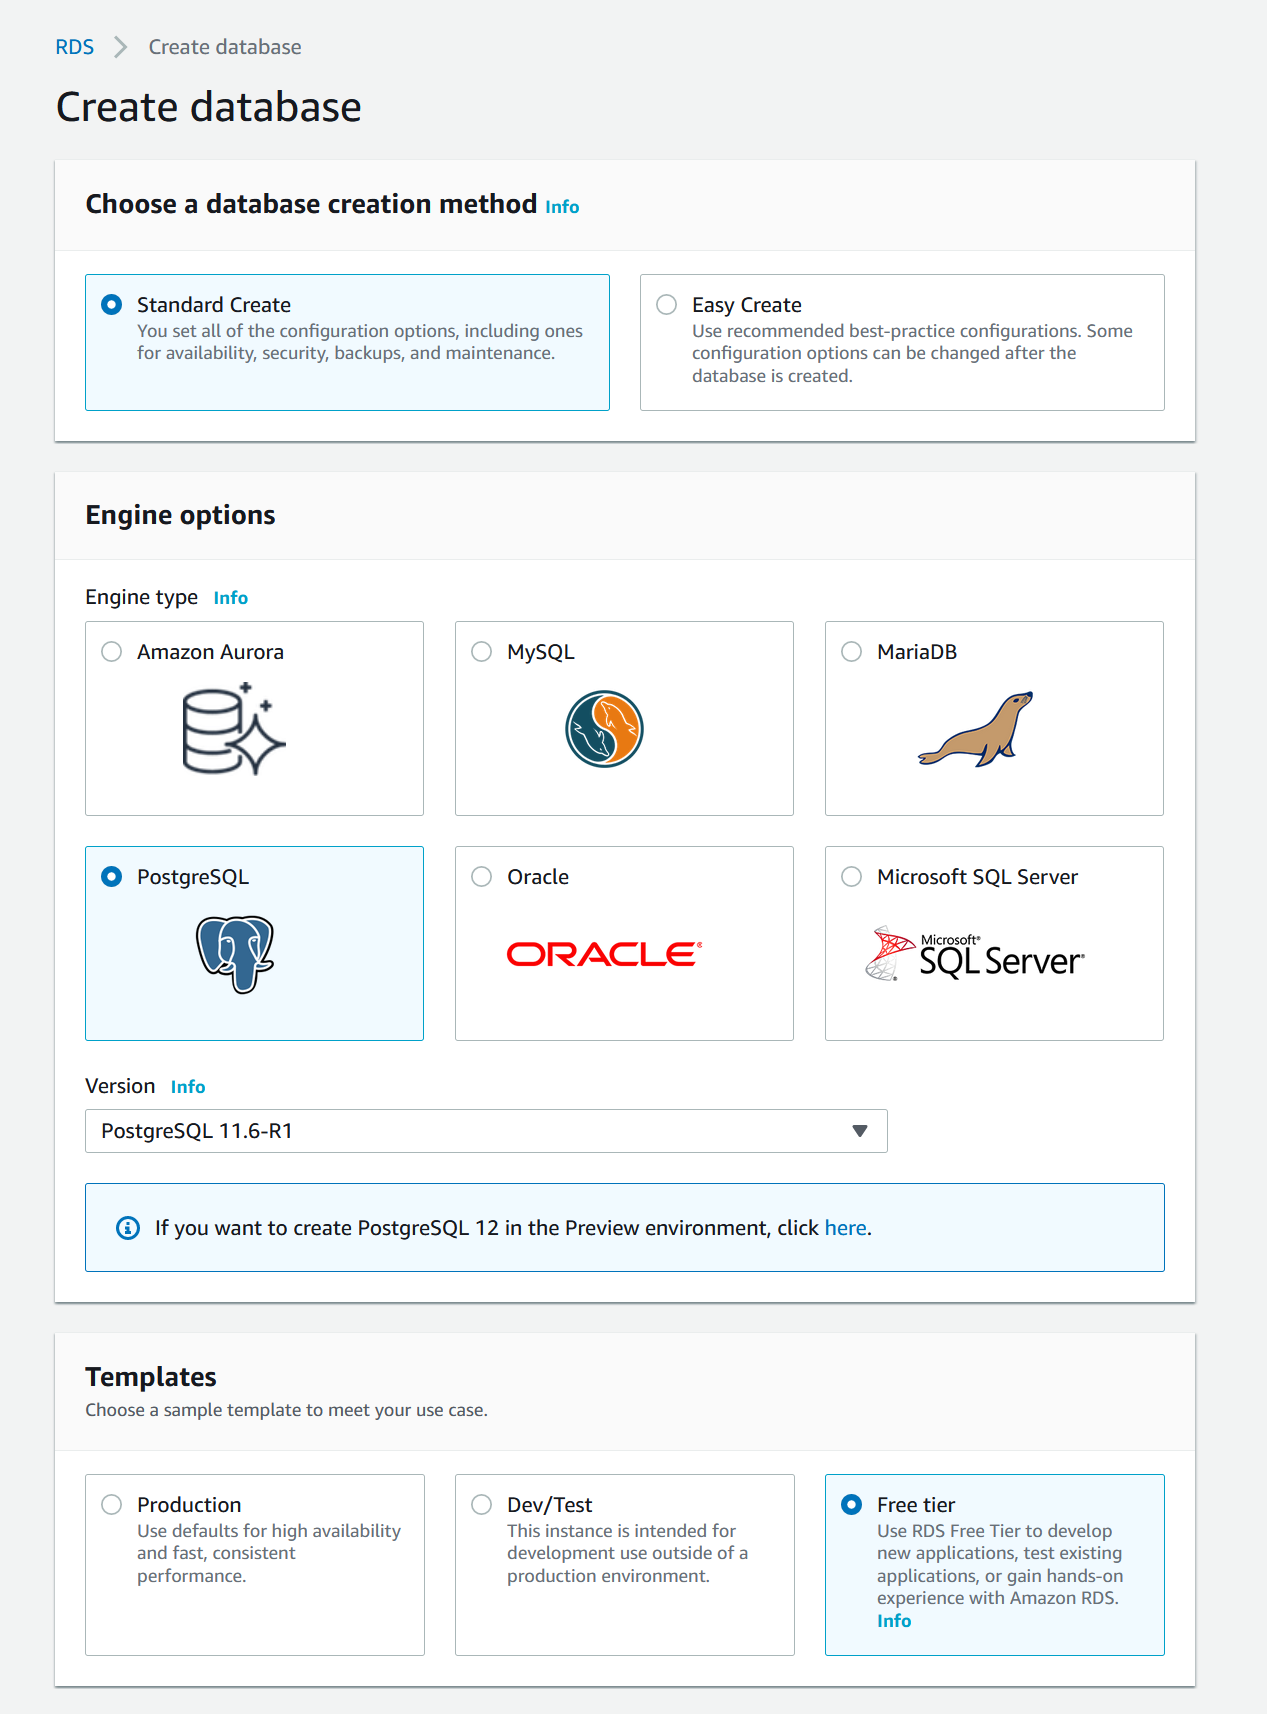
Create databasebutton - Select
Standard Create - Select desired DB type, I went with
PostgreSQL - Make sure to select
Free TierunderTemplatesunless you are creating an actual Production stack - Under the Settings section, pick your database name, master username and password
- Leave
DB instance sizeas default - Leave
Storageas default - In the
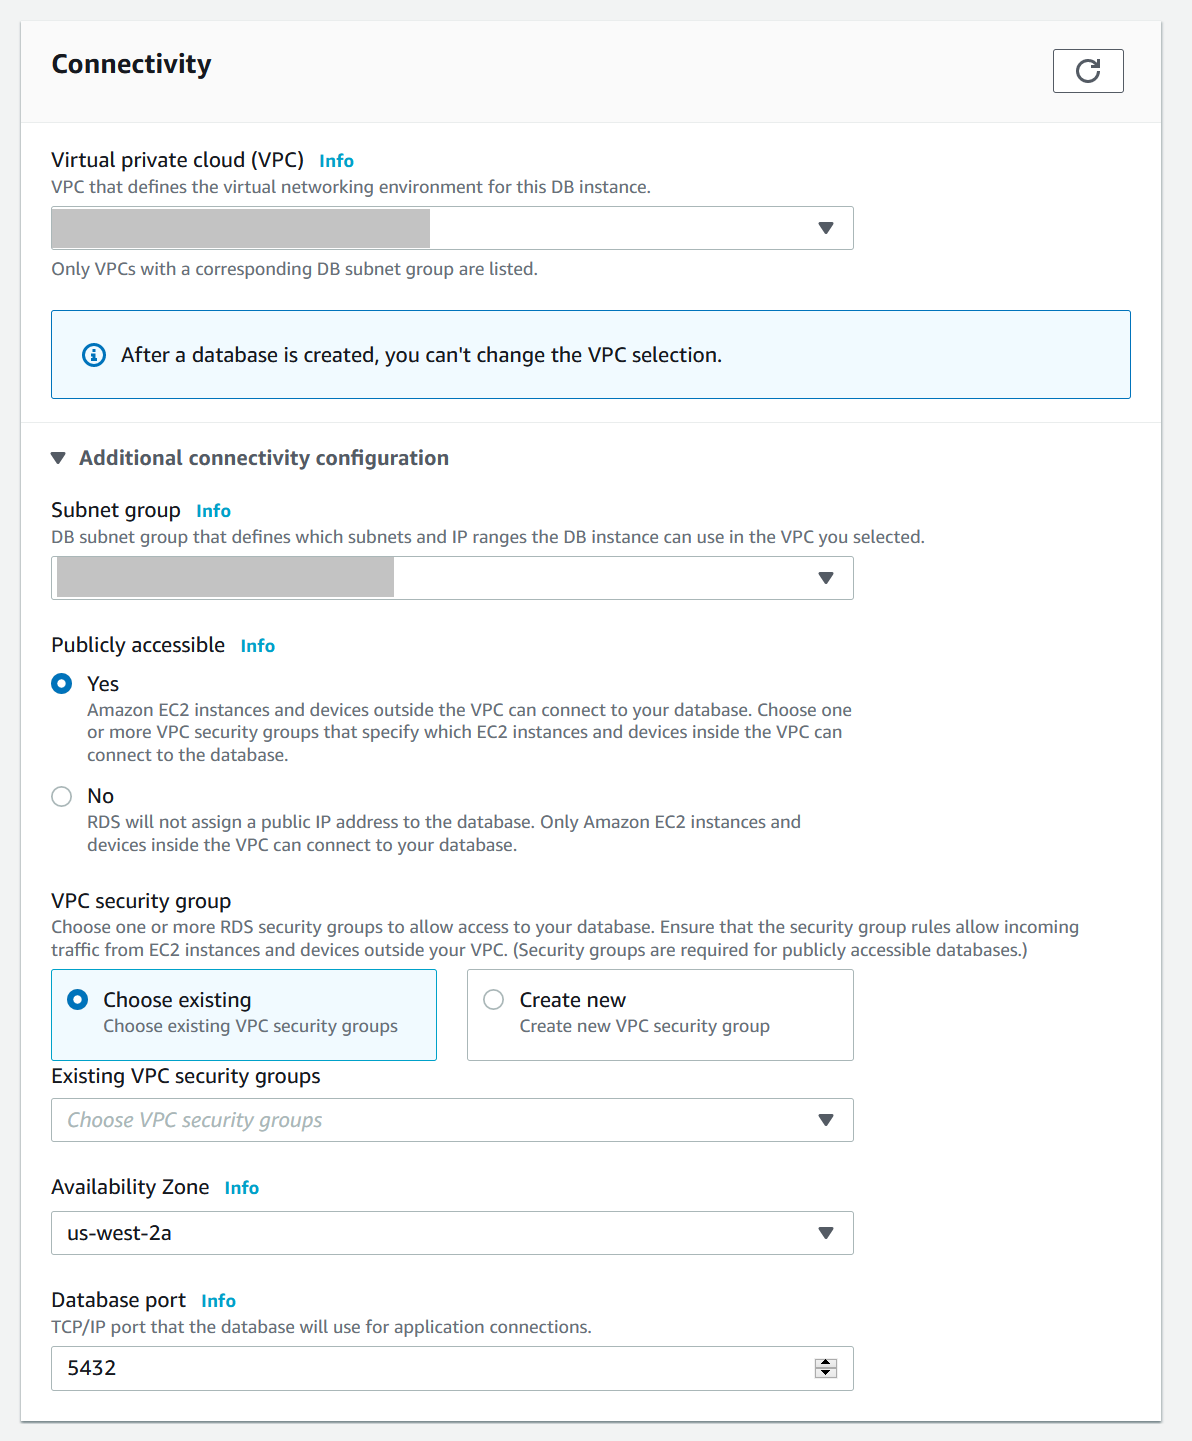
Connectivitysection make sure to select your VPC (not the default unless you want to)- Expand the
Additional connectivity configrationarea - Make the DB publicly accessible (note: this is a quality of life thing if we want to connect from our local machine to the DB, it will be locked down via the security group)
- Remove the Default VPC security group and instead select the RDS security group we created earlier (ie,
app_name-db) - Pick any availability zone, ideally one of the ones that we selected for the subnets earlier
- Pick a database port, or use the default one for Postgre (
5432)
- Expand the
- Scroll to the bottom and hit the
Create databasebutton
Elastic Beanstalk
Now we get to the final part of our AWS setup, which is to create our Elastic Beanstalk environment and application. All the pre-work we did up to the point will make the configuration very straight forward.
Environment & Application
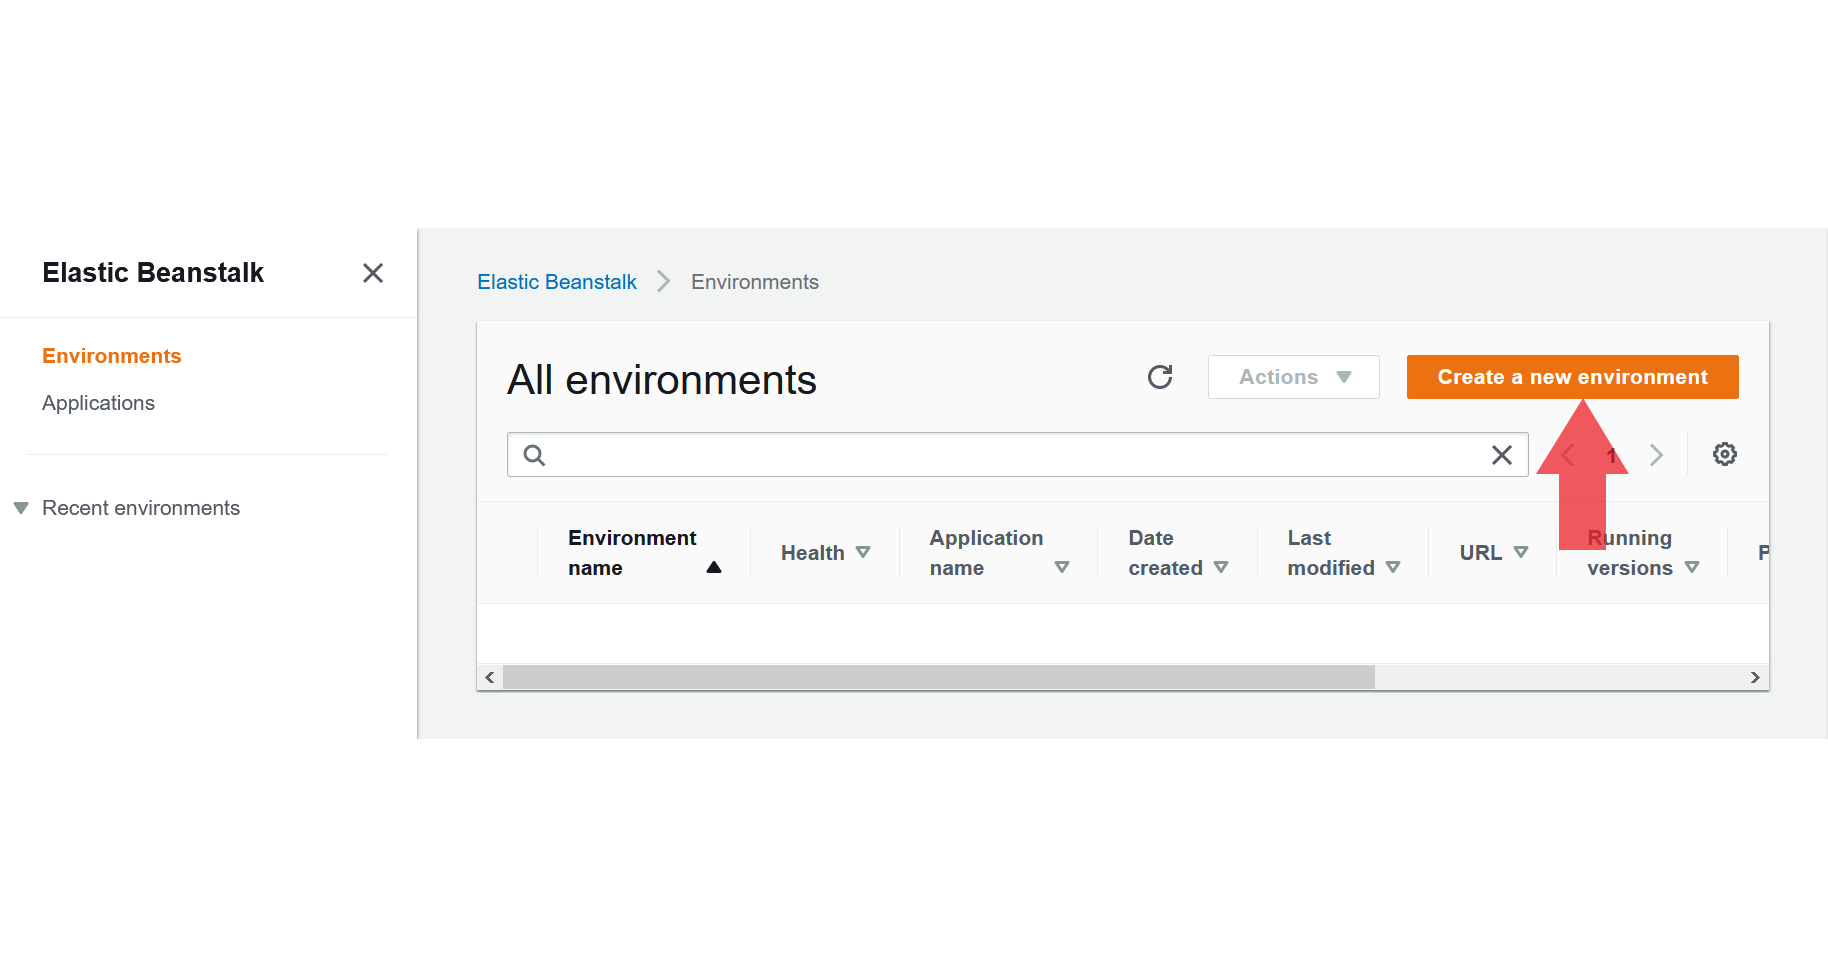
- Go to the Elastic Beanstalk page
-
From the left navbar, select
Environments - Create a new Environment
- This will also create a new application at the same time
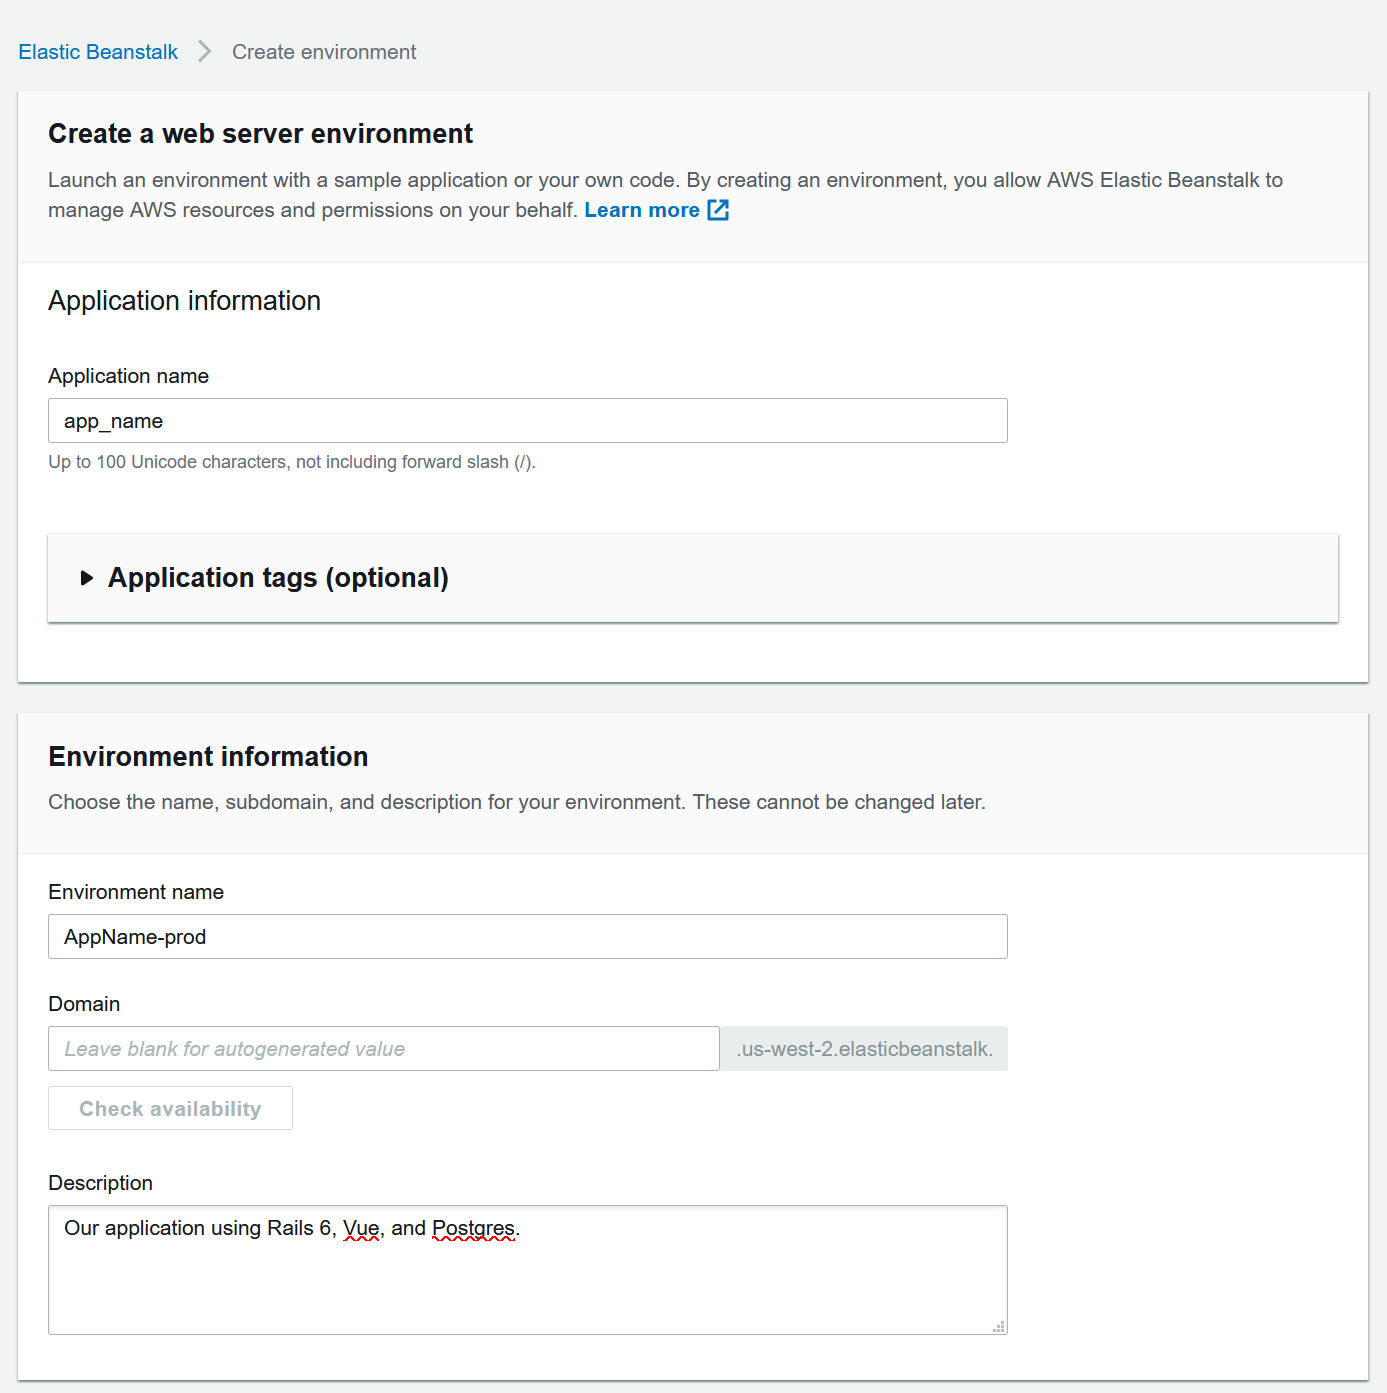
- Create a
Web server environmentand hitSelect - Enter an application name and description
- Enter an environment name and let EB generate your domain
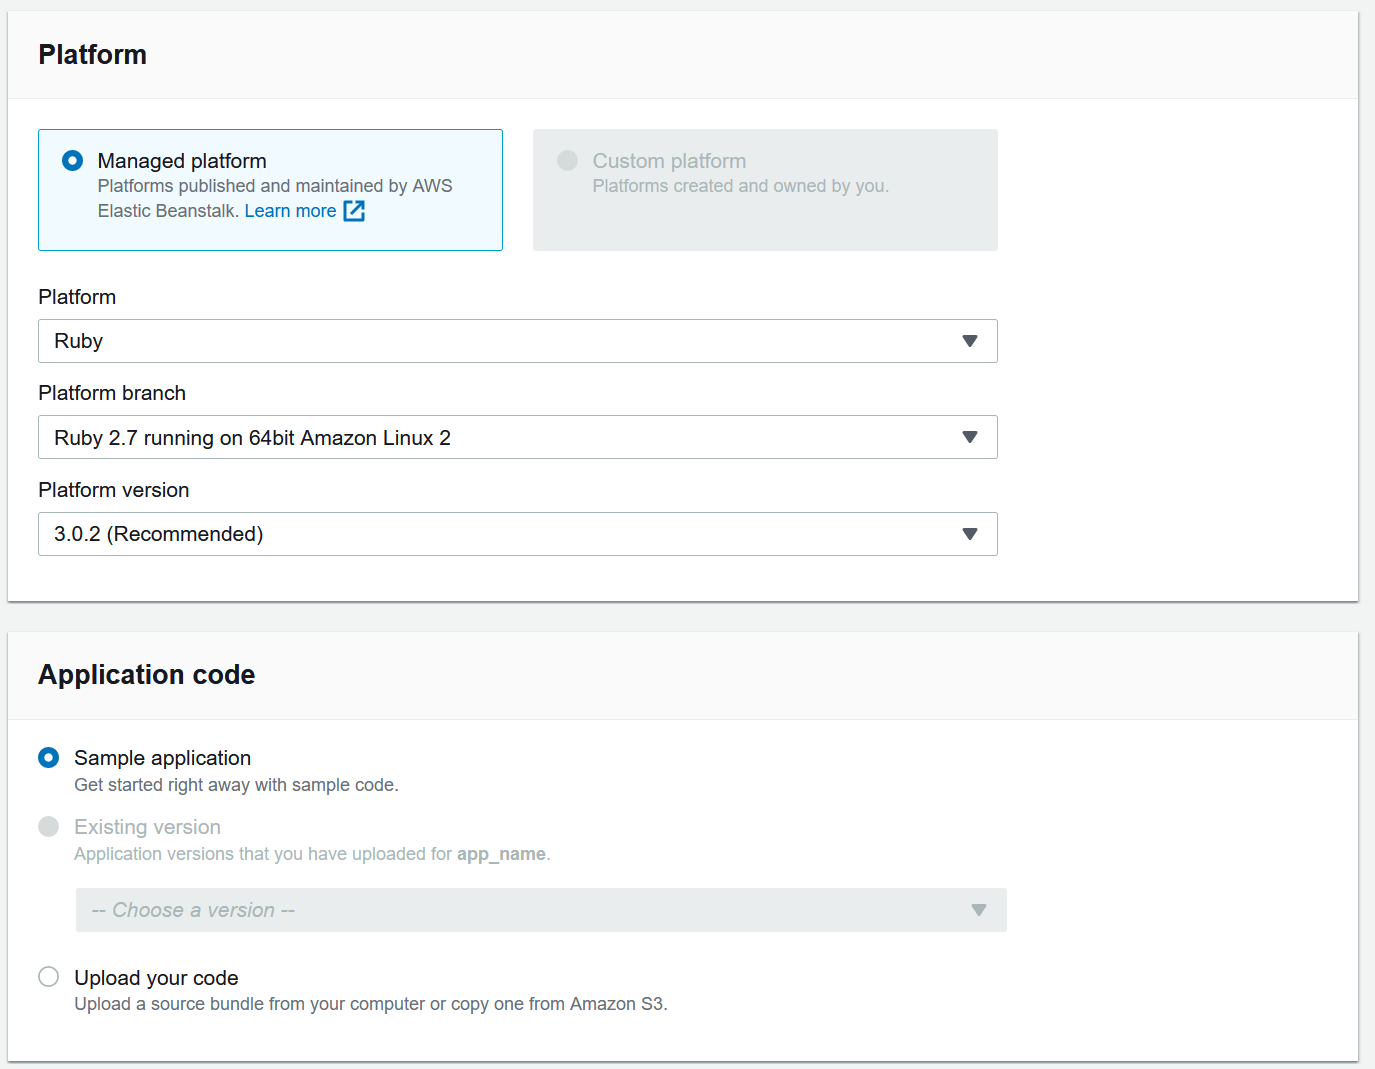
- Select
Managed platformand use Platform:Ruby, Platform branch:Ruby 2.7 running on 64bit Amazon Linux 2, and Platform version:3.0.2 - Use the
Sample applicationfor now, we will push our code eventually
- Hit the
Create environment button
<img src=”/images/2020_06_02_setting_up_aws/management_console_eb_dropdown.png”class=”center-image” />

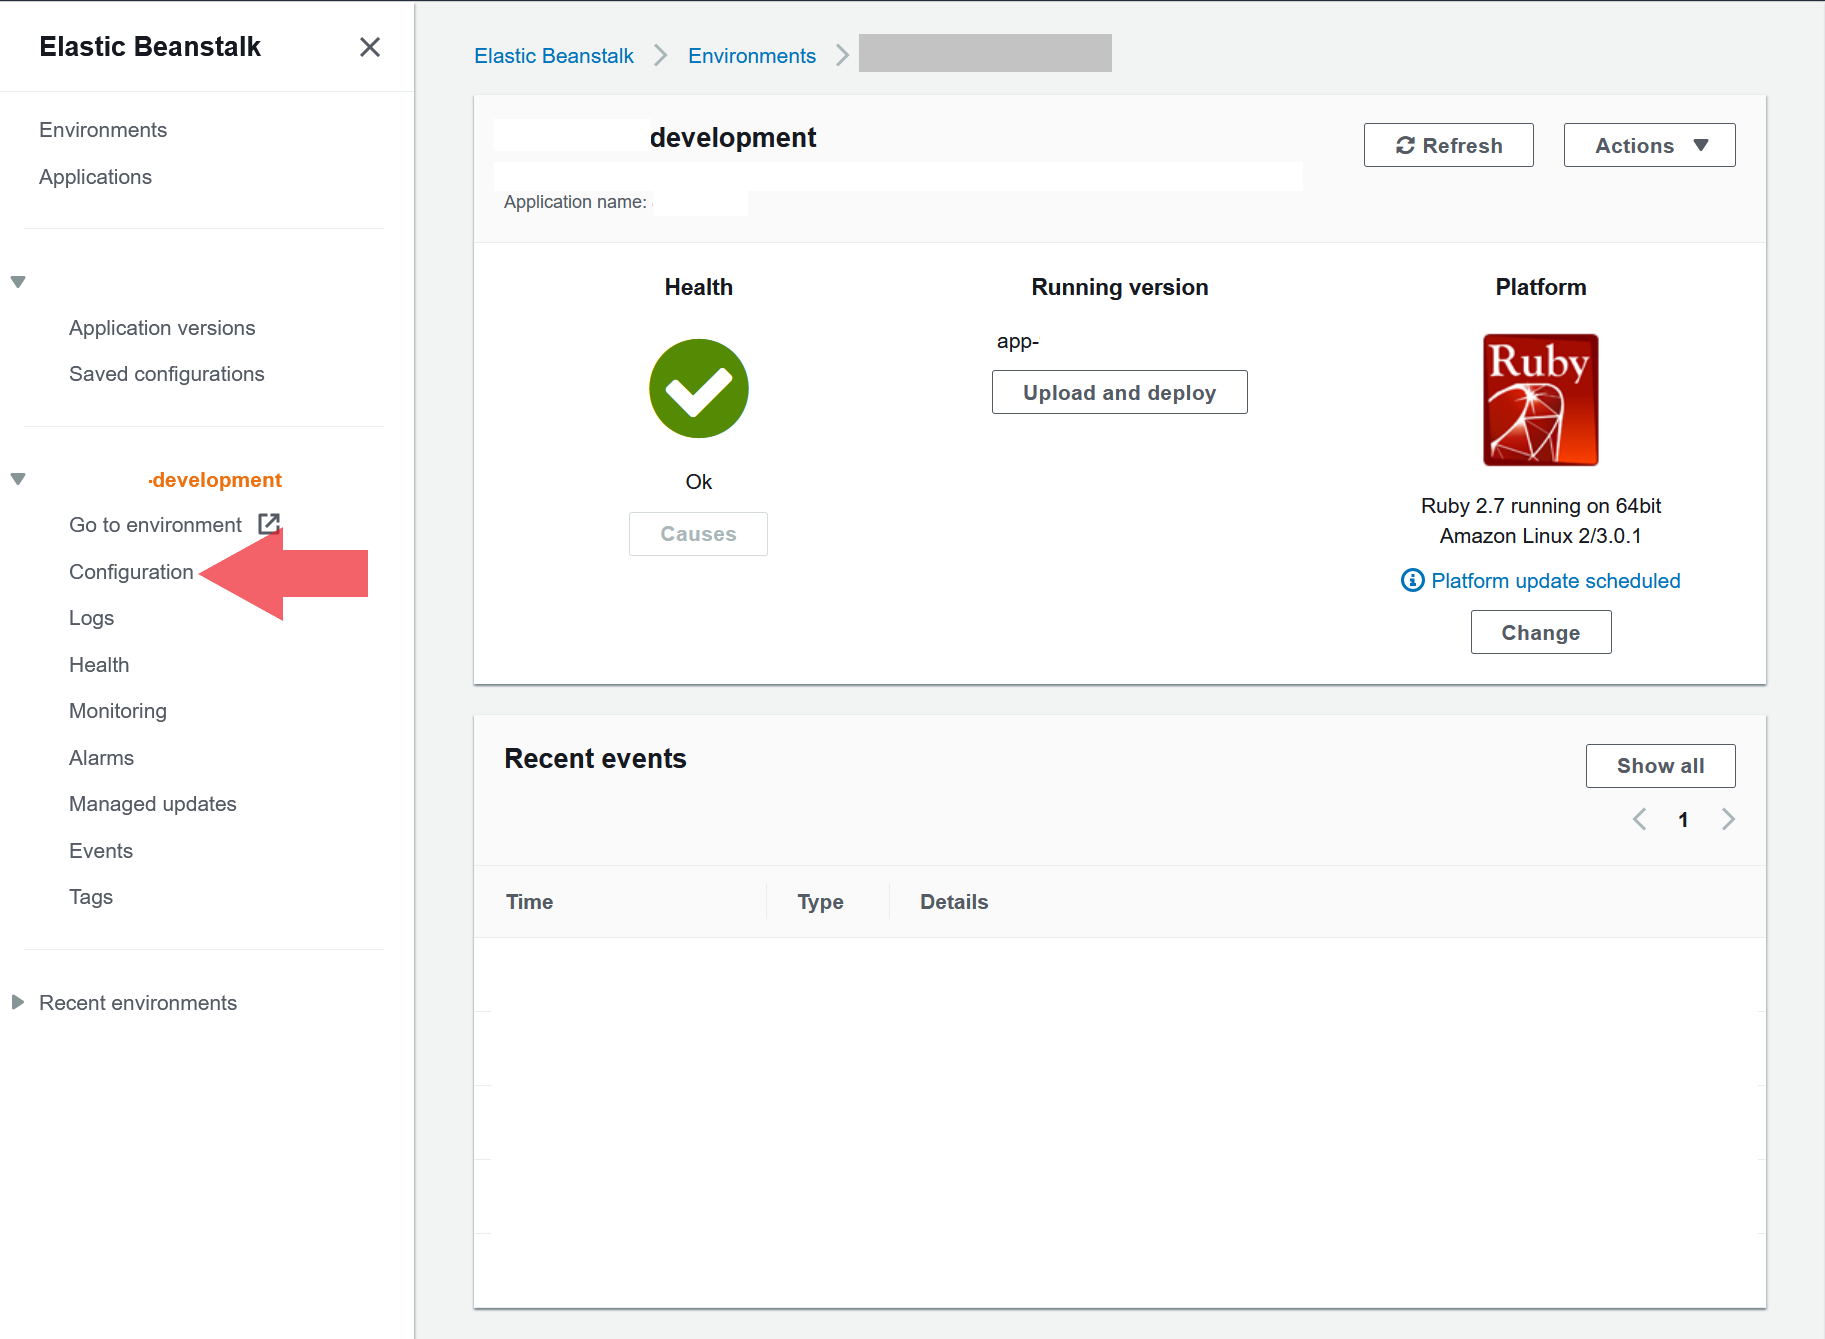
For the next sections, simply go to your application in beanstalk and click on the environment name. This will take you to a page that looks like this:
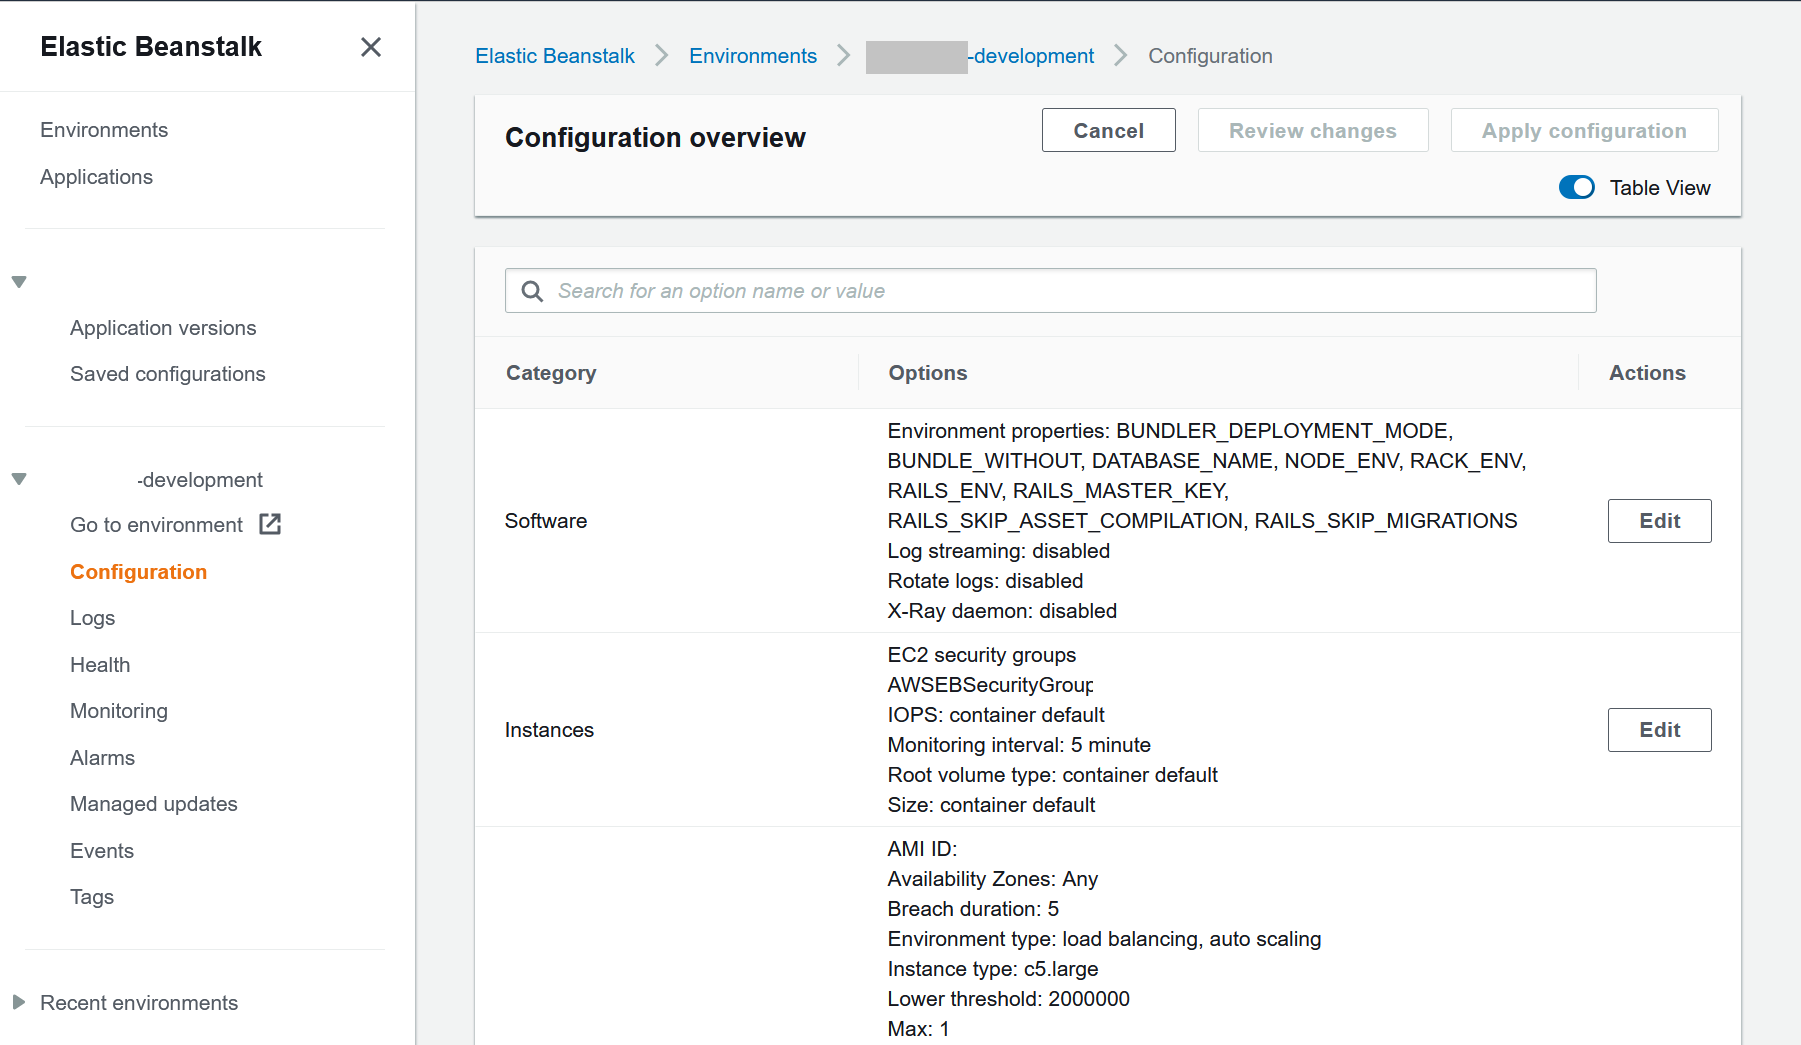
Beanstalk Configuration - Software
- Go to the Software section of the EB configuration section
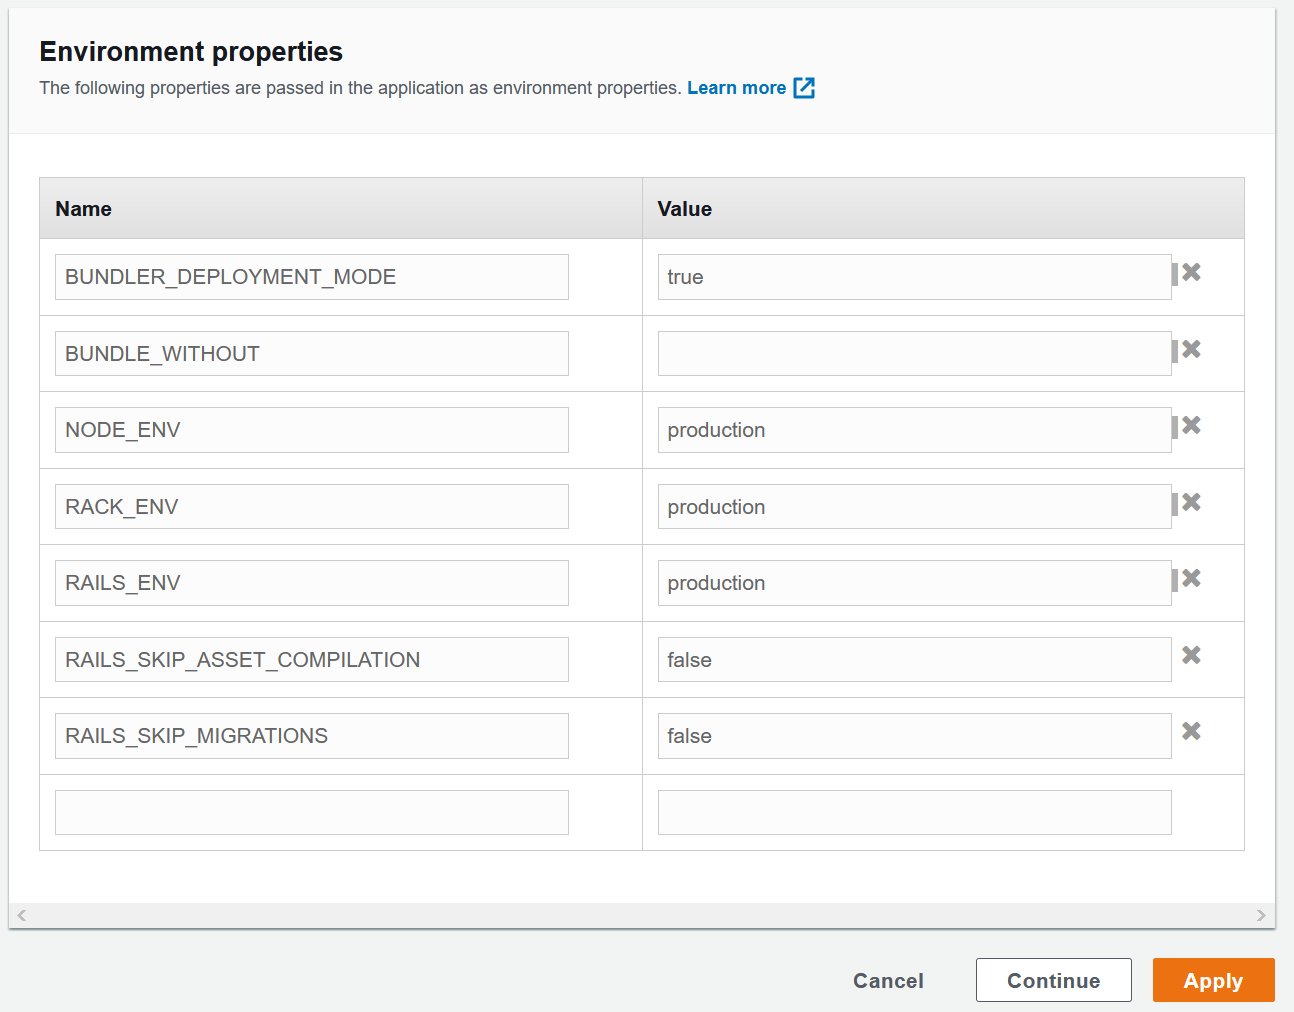
- Under the
Environment Propertiessection make sure the following environment variables are setBUNDLER_DEPLOYMENT_MODE = trueBUNDLE_WITHOUT=(blank value)NODE_ENV = productionRACK_ENV = productionRAILS_ENV = productionRAILS_SKIP_ASSET_COMPILATION = falseRAILS_SKIP_MIGRATIONS = false
Beanstalk Configuration - Instances
- Go to the Instances section of the EB configuration section
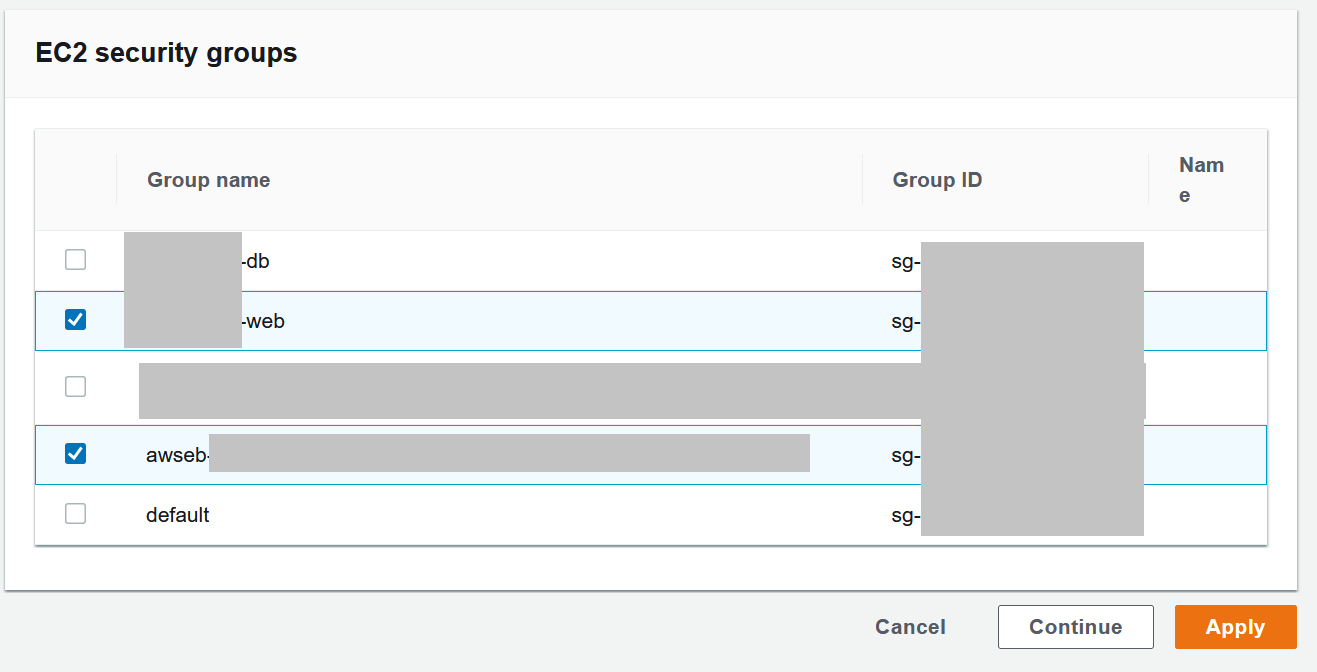
- Under the
EC2 security groupssection select the web security group we created earlier along with the default EB security group that is already checked- The security group that should be added is
app_name-web
- The security group that should be added is
- Leave everything else as default values
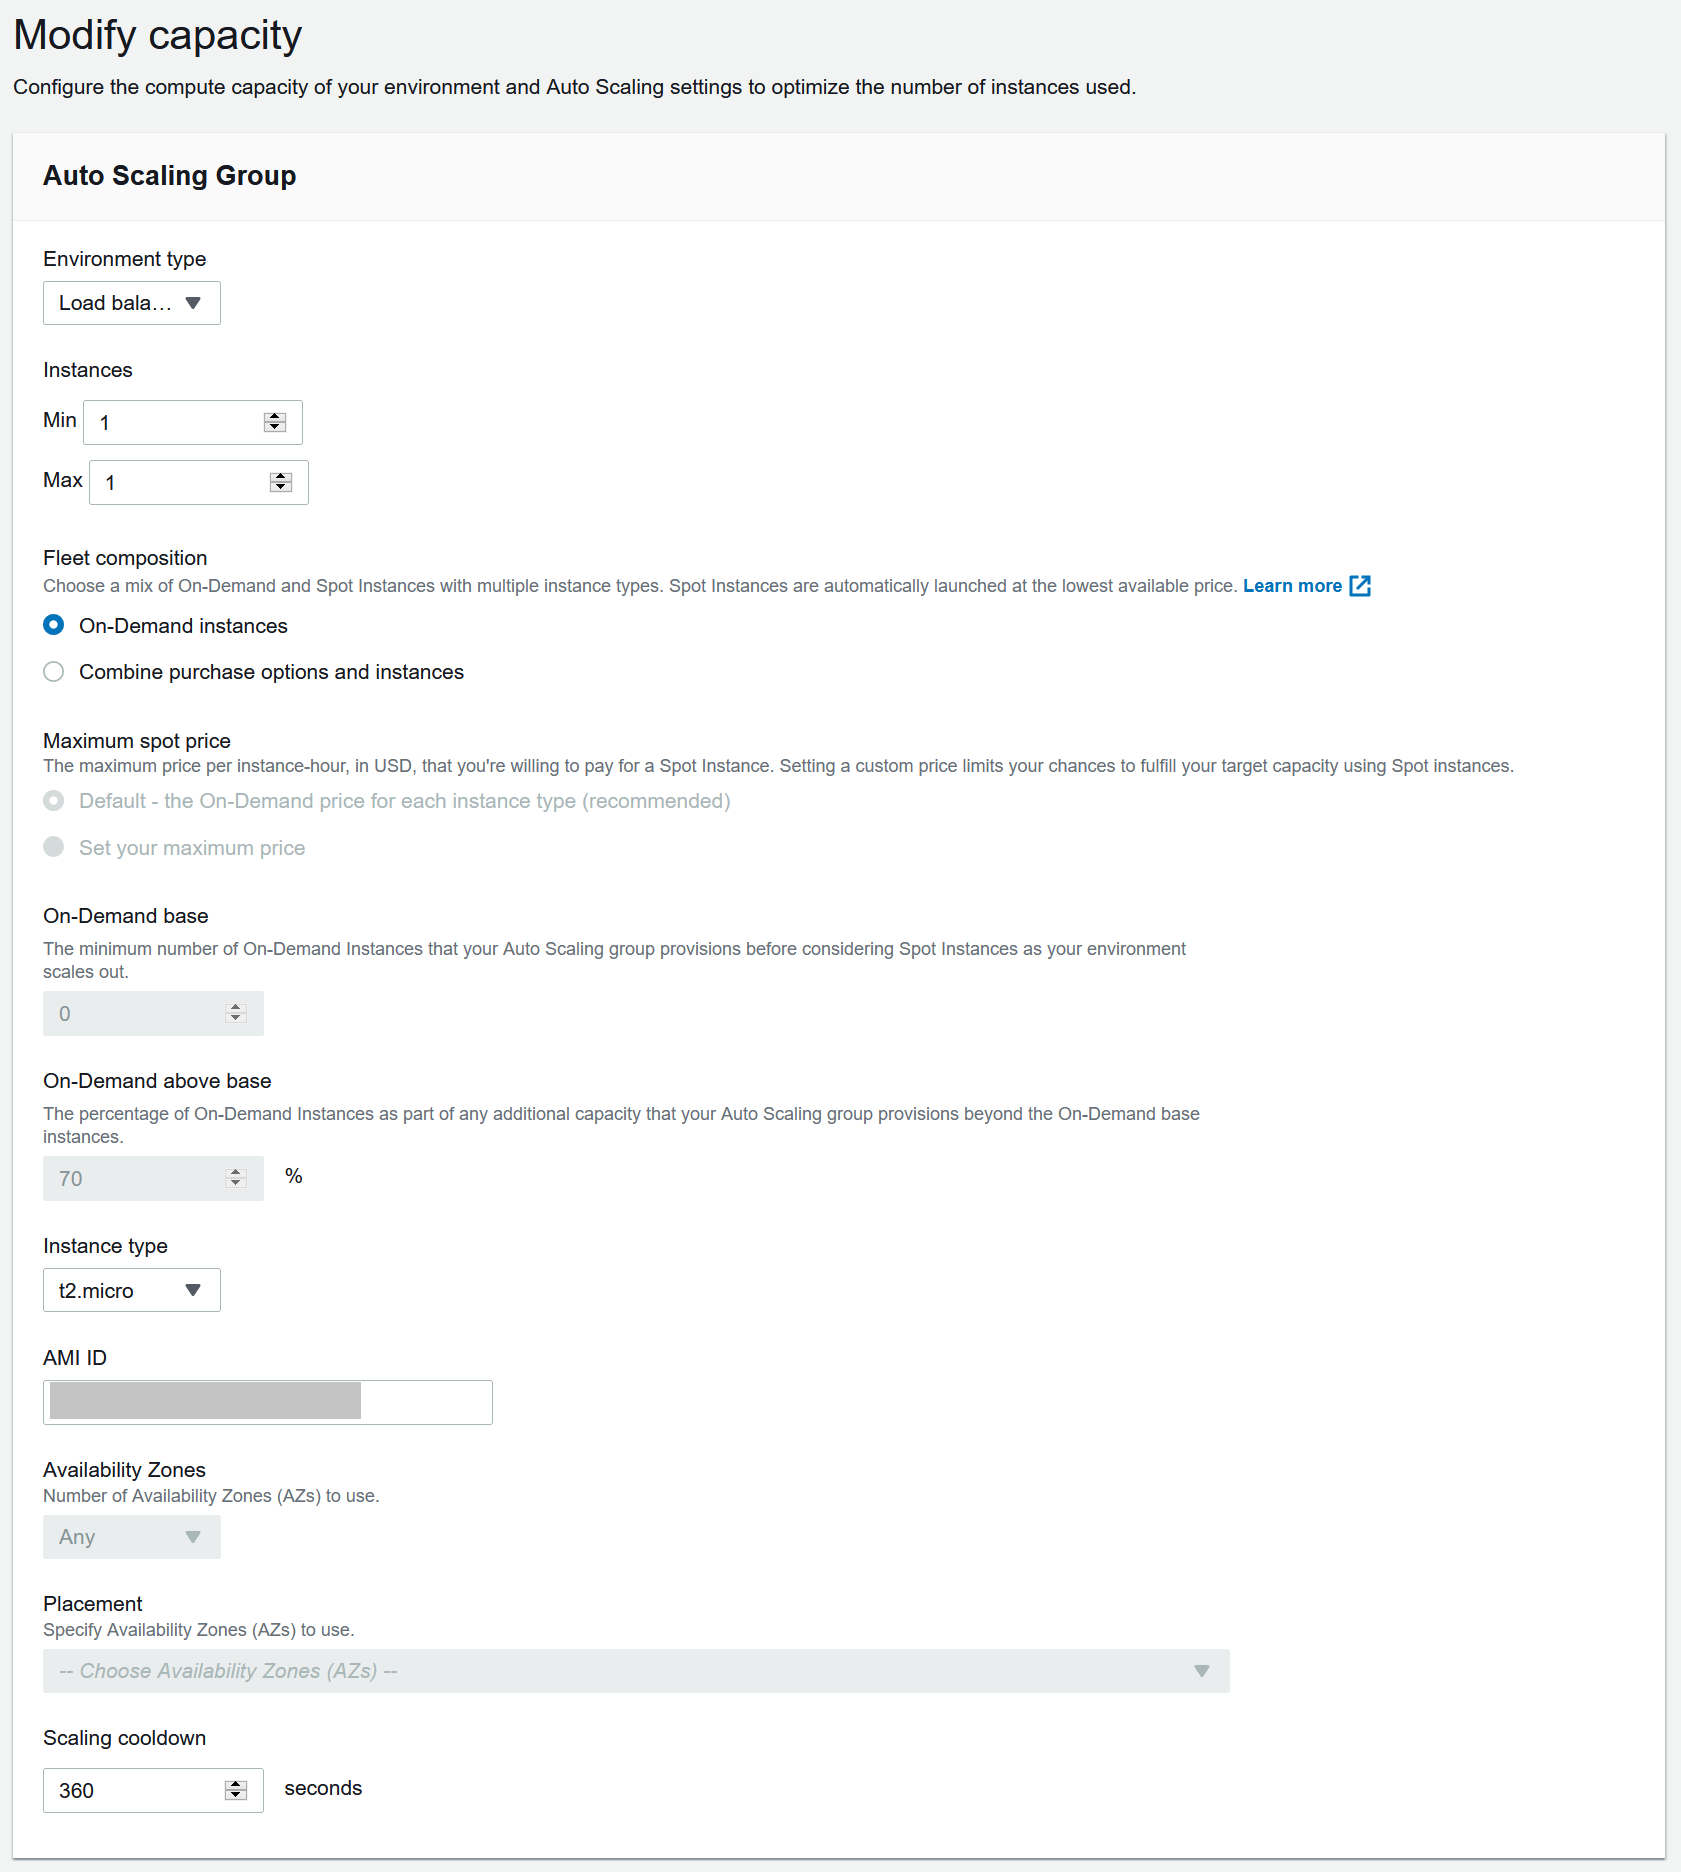
Beanstalk Configuration - Capacity
This step is completely optional and you can skip this if you do not want to use an ELB.
- Go to the Capacity section of the EB configuration section
- Under the
Auto Scaling Groupsection- Swap environment type to
Load balanced - [Optional] Set max instances to desired max count if scale out desired
- [Optional] Set Instance type to a larger host depending on your application needs, this will incur charges!
- Swap environment type to
- Under the
Scaling triggerssection- Update the scaling triggers to what your application needs or just leave it to the default values for now, we can change this at any time
Beanstalk Configuration - Load Balancer (ELB)
This step is completely optional and you can skip this if you do not want to use an ELB.
- Go to the Load Balancer section of the EB configuration section
- Under the
Listenerssection- Make sure you have at least an HTTP listener
- Add in your HTTPS listener with your cert (you can use AWS ACM which will provision a free certificate)
- Not much is required, you can also leave everything as default to have an ALB with an HTTP listener by default
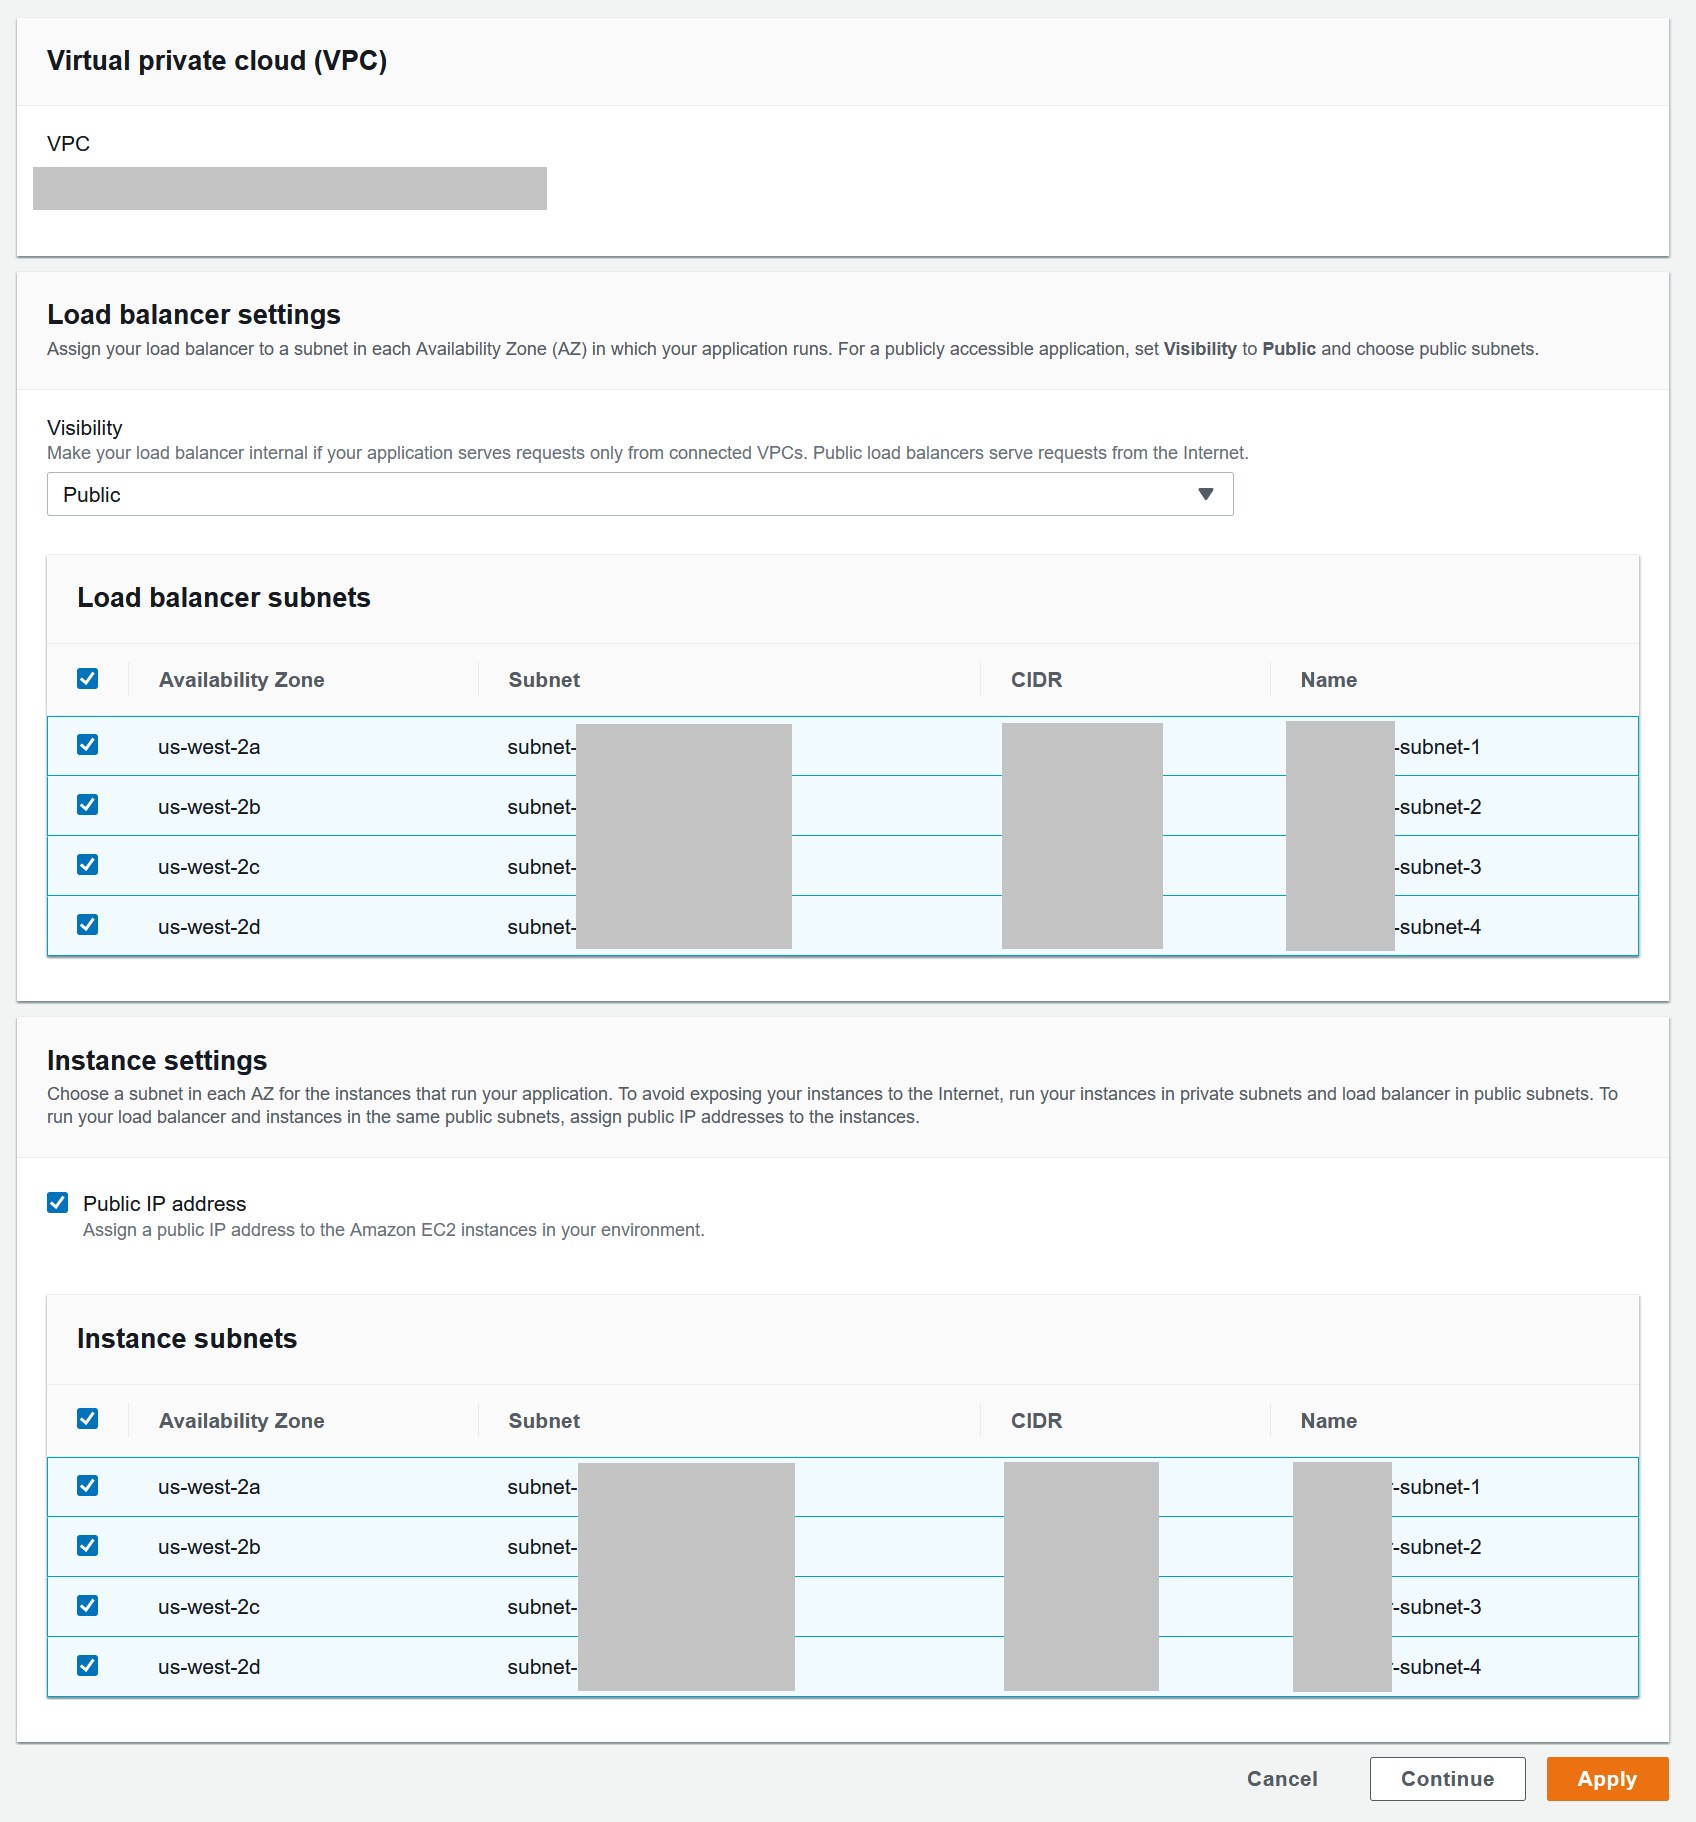
Beanstalk Configuration - Network
This step is completely optional and you can skip this if you do not want to use an ELB.
- Go to the Network section of the EB configuration section
- Under the
Load balancer settingssection- Make your ELB Public
- Select the subnets created earlier
- Under the
Instance settingssection- Make sure to enable
Public IP addreesson your instances so that the ELB will be able to send traffic to them - Enable all subnets here as well
- Make sure to enable
Conclusion
Now our AWS stack is ready for us to deploy and iterate on top of! At this point we have created security groups, a VPC and subnets for it, configured the routing table and opened the VPC to the internet via an internet gateway, and lastly spun up an RDS database. With all of this and our elastic beanstalk environment, we can make changes and deploy our application with super ease, a simple call to eb deploy will get us up and running. We will launch our application in the next post in this series.
To check out the default application that elastic beanstalk has created for us, navigate to the endpoint that beanstalk provisioned to see the sample stack up and running.
Rails 6 Series
- Rails 6 Series - Starting Rails 6 with Vue on AWS
- Rails 6 Series - Setting up AWS resources
- Rails 6 Series - Deploying to AWS
- Rails 6 Series - Configuring Vue and Webpack